An Advanced Guide : Micropipette
- April 26, 2022
- ENQUIRE NOW
What is a micropipette?
A micropipette is a common yet an essential laboratory instrument used to accurately and precisely transfer volumes of liquid in the microliter range. Micropipettes are available in single-channel and multi-channel variants. While the single-channel micropipettes are used in labs that perform research related to molecular biology, microbiology, immunology, cell culture, analytical chemistry, biochemistry and genetics, the multichannel micropipettes are recommended for ELISA (diagnostic test), molecular screening, kinetic studies and DNA amplification.
Types of micropipette
Micropipettes can be classified depending upon:
Working Principle
A. Air Displacement Micropipette
This type of micropipette works on the air displacement principle. It consists of a piston which aspirates and dispenses liquid samples as the air pocket moves up and down, respectively. The internal mechanism of the pipette does not come in direct contact of the sample/liquid. Instead, a disposable pipette tip is used to draw the liquid into and dispense from the pipette.
B. Positive Displacement Micropipette
In these micropipettes, the piston comes in direct contact of the sample. The disposable tip in a positive displacement micropipette is a microsyringe composed of a capillary and a piston (movable inner part) which directly displaces the liquid.
Operating Mechanism
A. Mechanical Micropipette
These micropipettes are operated manually based on a piston-shaft spring mechanism.
B. Electronic Micropipette
An electronic micropipette is mostly automated. The aspirating and dispensing of liquid is performed by the one-touch buttons instead of manual plunger pressing and depressing. Electronic pipettes also often enable the user to create custom programs on the device allowing the pipettes to suit diverse application needs. In an electronic pipette, the piston is motor-driven. Using an electronic pipette allows one to dispense precisely how it was programmed due to the motor control that allows the piston movement to be controlled.
Number of Channels
A. Single Channel Micropipette
A single channel micropipette is the one which has a single channel to aspirate or dispense the liquid.
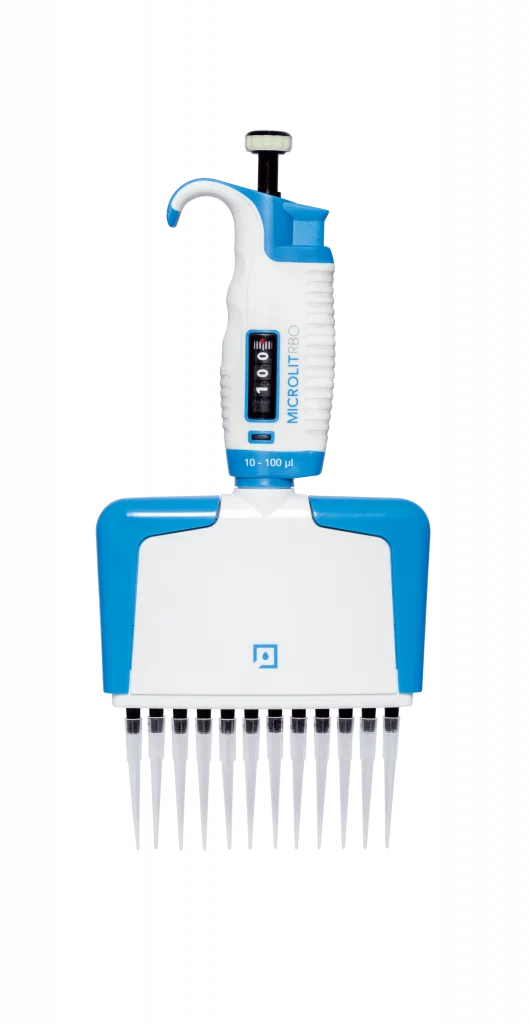
B. Multi Channel Micropipette
A multi channel micropipette has multiple channels to aspirate or dispense the liquid. The commonly available multi channel micropipette variants are the 8 channel, 12 channel and 16 channel. Multichannel micropipettes reduce the workload of a single channel micropipette when working with large volumes of samples.
For example – ELISA (enzyme-linked immunosorbent assay) is a plate-based assay technique designed for detecting and quantifying peptides, proteins, antibodies, and hormones. They are typically performed in 96-well (or 384-well) polystyrene plates, which will passively bind antibodies and proteins. The binding and immobilization of reagents makes ELISAs simple to design and perform. Having the reactants of the ELISA immobilized to the microplate surface enables easy separation of bound from non-bound material during the assay. This ability to wash away non-specifically bound materials makes the ELISA a powerful tool for measuring specific analytes within a crude preparation.
Volume/Capacity
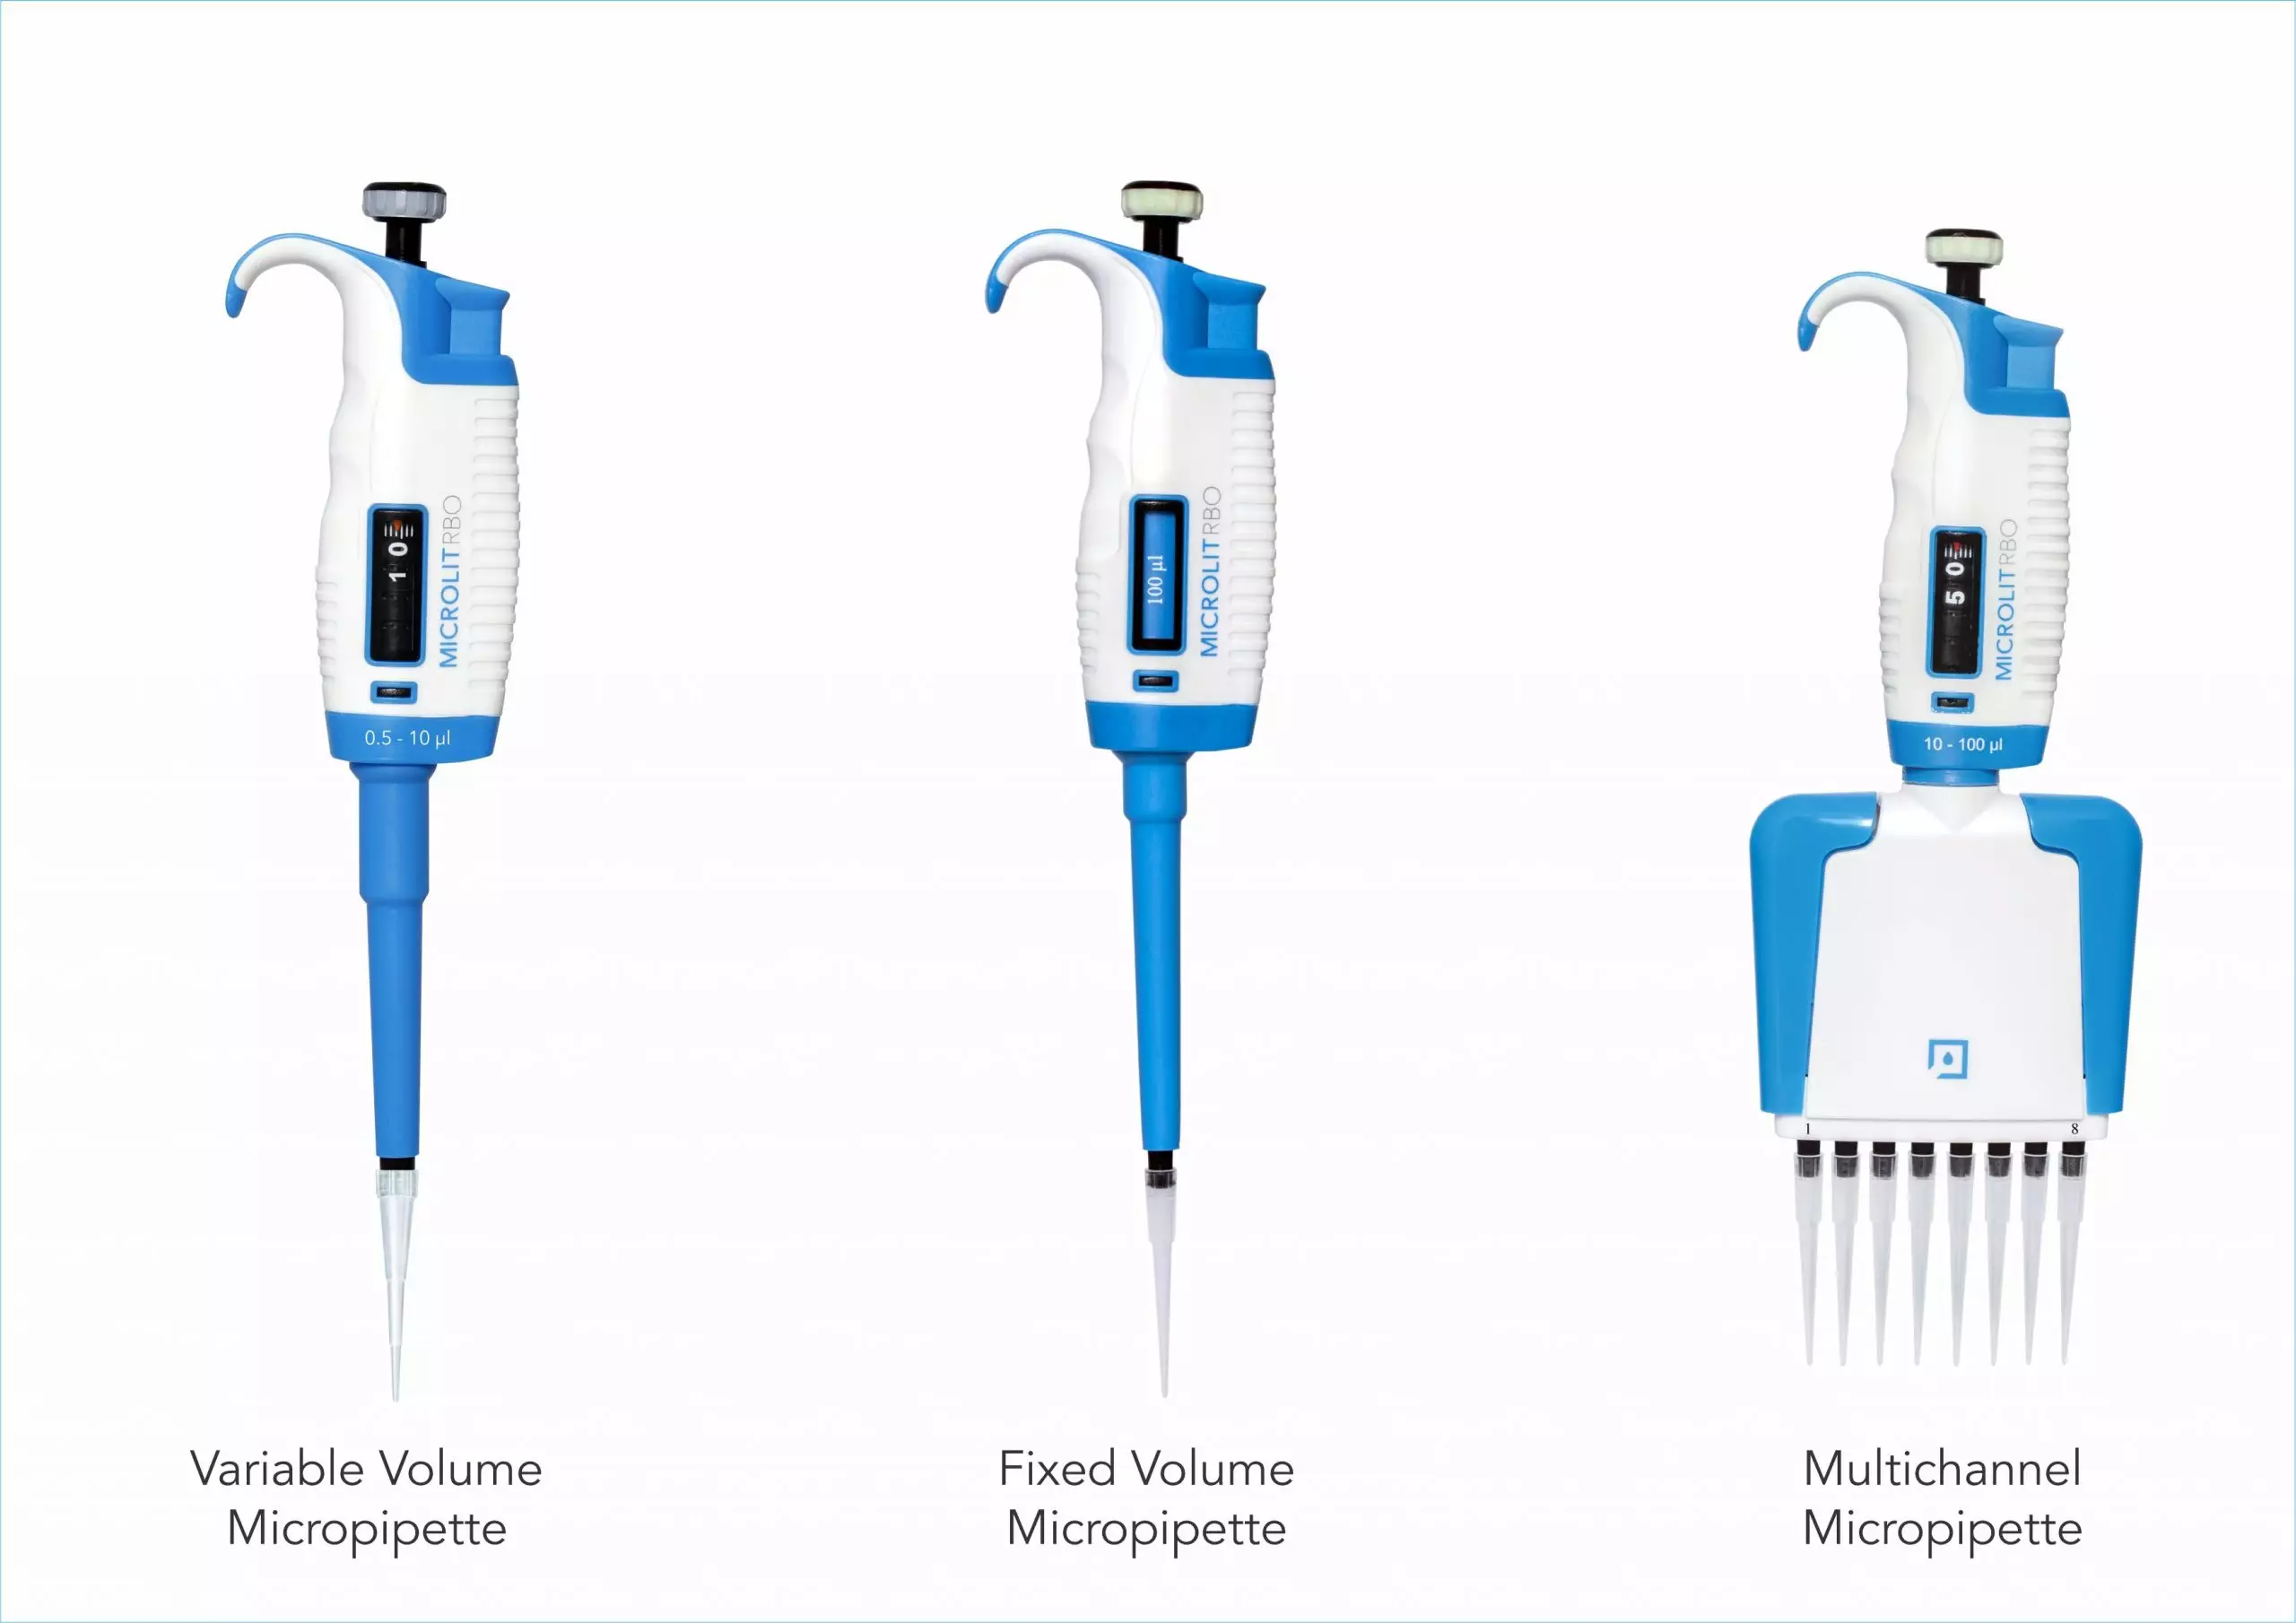
A. Fixed Volume Micropipette
In a fixed volume micropipette, the volume of liquid to be aspirated or dispensed remains fixed. These micropipettes are used when the same volume of liquid is to be dispensed multiple times.
B. Variable Volume Micropipette
This micropipette comes with a specific minimum and maximum volume range. The volume of the liquid to be aspirated or dispensed can be adjusted (within the instrument’s volume range) depending upon the requirement of the user.
Air displacement micropipettes operate by piston-driven air displacement. When the piston is pressed downwards, the air within the sleeve of the micropipette gets expelled out due to the force of which the liquid present in the tip of the micropipette also gets removed.
When the piston moves upwards, a vacuum is created in the space left vacant by the piston. This causes the air from the tip to rise in order to fill the vacant space, and the tip air is then replaced by the liquid, which is drawn up into the tip.
Positive displacement micropipettes operate by piston-driven displacement. The piston in a positive displacement micropipette is in direct contact with the liquid. When the piston is pressed downwards, the liquid which is present in the sleeve of the micropipette also moves downwards and gets removed through the tip. When the piston is pulled upwards, it also draws the liquid along with it in the upward direction.
1. Using an Air Displacement Micropipette
Precise measurement of liquid depends on the correct micropipette usage. The air displacement micropipettes work on the common air displacement principle. A plunger is depressed by the thumb and as it is released, liquid is drawn into a disposable tip. When the plunger is pressed again, the liquid is dispensed. In between these steps, there are several small steps which help in making the liquid dispensing process more precise.
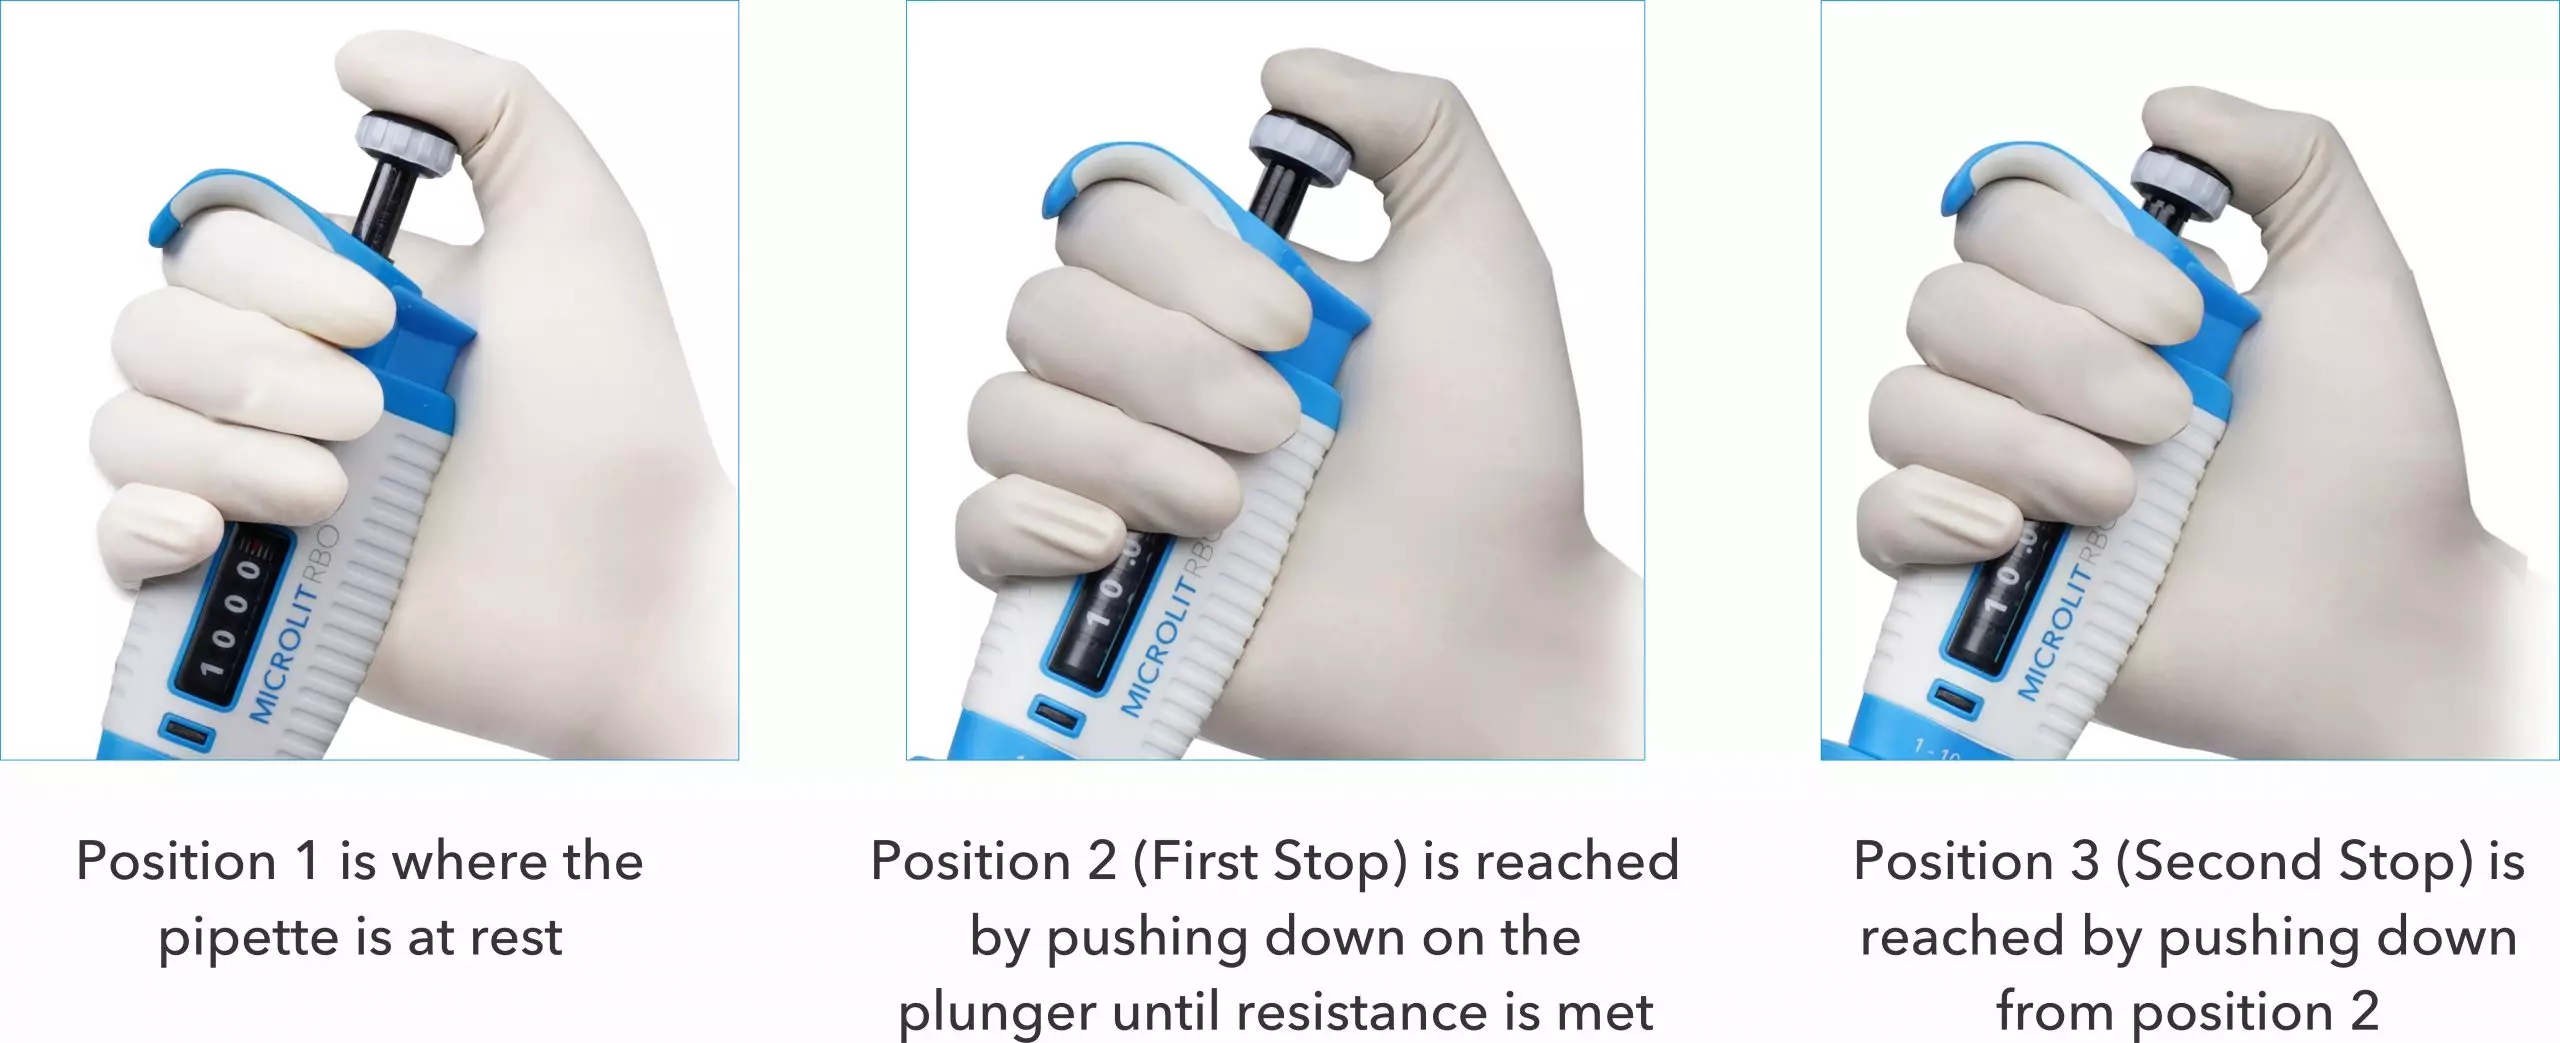
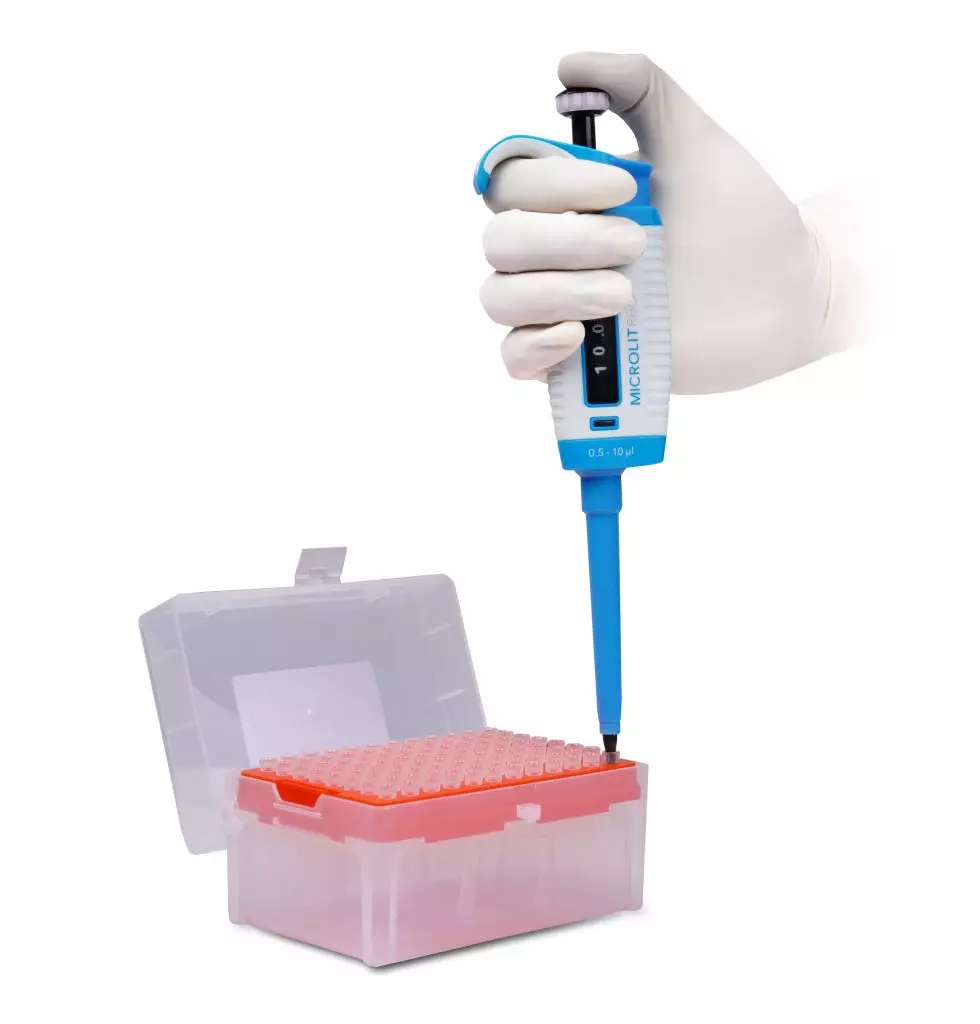
| Position 1 | In this, the micropipette is at rest position. | Press fit a tip to the micropipette without directly touching the tip. |
| Position 2 | In this, the plunger is depressed till the first stop. | To aspirate the liquid in the tip, press the plunger to the first stop. Immerse the pipette tip vertically in the liquid. |
| Release the plunger | Slowly release the plunger while the tip is immersed. The liquid will be aspirated into the pipette tip.
Liquid is filled in the tip as per preset micropipette volume. |
|
| Position 3 | Depress the plunger | To dispense the liquid, place the tip on the inner wall of the receiving vessel at a steep angle.
Slowly press the plunger to the first stop to dispense the liquid. |
Some micropipettes deliver the fixed volume of liquid. However, the majority are adjustable with the variable volume setting. Variable volume micropipette comes with different ranges and upper & lower limits of measurement. In such cases, error percentage may vary as per the measured liquid. Trying to dispense less than the lower value of the range will result in inaccurate liquid measurements where trying to dispense over the upper range will completely fill the tip and allow the liquid to enter into the pipette body.
2. Cleaning, maintenance and storage of a micropipette
The care and maintenance of a micropipette is an important routine in laboratories. Implementing a proper maintenance schedule can reduce the cost of a new purchase of this expensive equipment. Cleaning the micropipette takes time, focus and practice; otherwise the micropipette can be damaged. So, it is important to handle the micropipette carefully while cleaning. The following is a comprehensive guide for proper cleaning of micropipettes.
I. External Cleaning: Most of the pipette can be cleaned externally with typical laboratory cleaning agents, soaps or alcohol. To ensure the full sterilization, let the cleaning solution sit on the micropipette for 10-15 min before wiping it off.
II. Internal Cleaning: Cleaning the interior of the micropipette can be more time consuming because it requires full disassembly. Also, every part of micropipette will need to be cleaned properly depending on the liquid used in sampling.
– Refer to the instructions manual for specific direction of micropipette
– Use a cotton swab with cleaning solution and distilled water
– Lightly grease the pistons with the lubricant provided upon purchase
– Reassemble all parts and check to ensure the micropipette operates smoothly
III. Contamination Cleaning: If micropipette becomes contaminated with a known substance, there are specific cleaning steps that must be taken depending on the type of substance. Above cleaning routine will not be sufficient if the micropipette is cross-contaminated.
| Solution Types | Process to clean |
| For aqueous solutions, organic solvents and proteins | Rinse the contaminated parts with distilled water or 70 percent ethanol and air dry at approx 60°F temperature. |
| For infectious liquids | Autoclave the lower section at a temperature of 120°C for 15-20 minutes then allow it to return at room temperature before reassembling. |
| For radioactive substances | Place the pipette in a solution like Decon and then rinse and air dry. |
| For nucleic acids | Boil lower parts of micropipette in glycine/ HCI buffer (pH2) for 10 minutes, rinse with distilled water, and air dry. |
A well-maintained and clean pipette ensures the lab safety from hazardous solutions. It makes the pipette more accurate, reliable, long-lasting and reduces the cost of sampling.
Proper storage of micropipettes is as important as cleaning and calibrating them. The micropipette and its accessories should be stored in a clean, cool and dry place. The storage place should have a temperature ranging from -20 °C to 50 °C (from -4 °F to 120 °F) with relative humidity between 5% and 95%. Another point to be remembered is that the instrument should be stored in an upright position. To store pipettes, Microlit recommends the use of its carousel stand, Microlit Faveo.
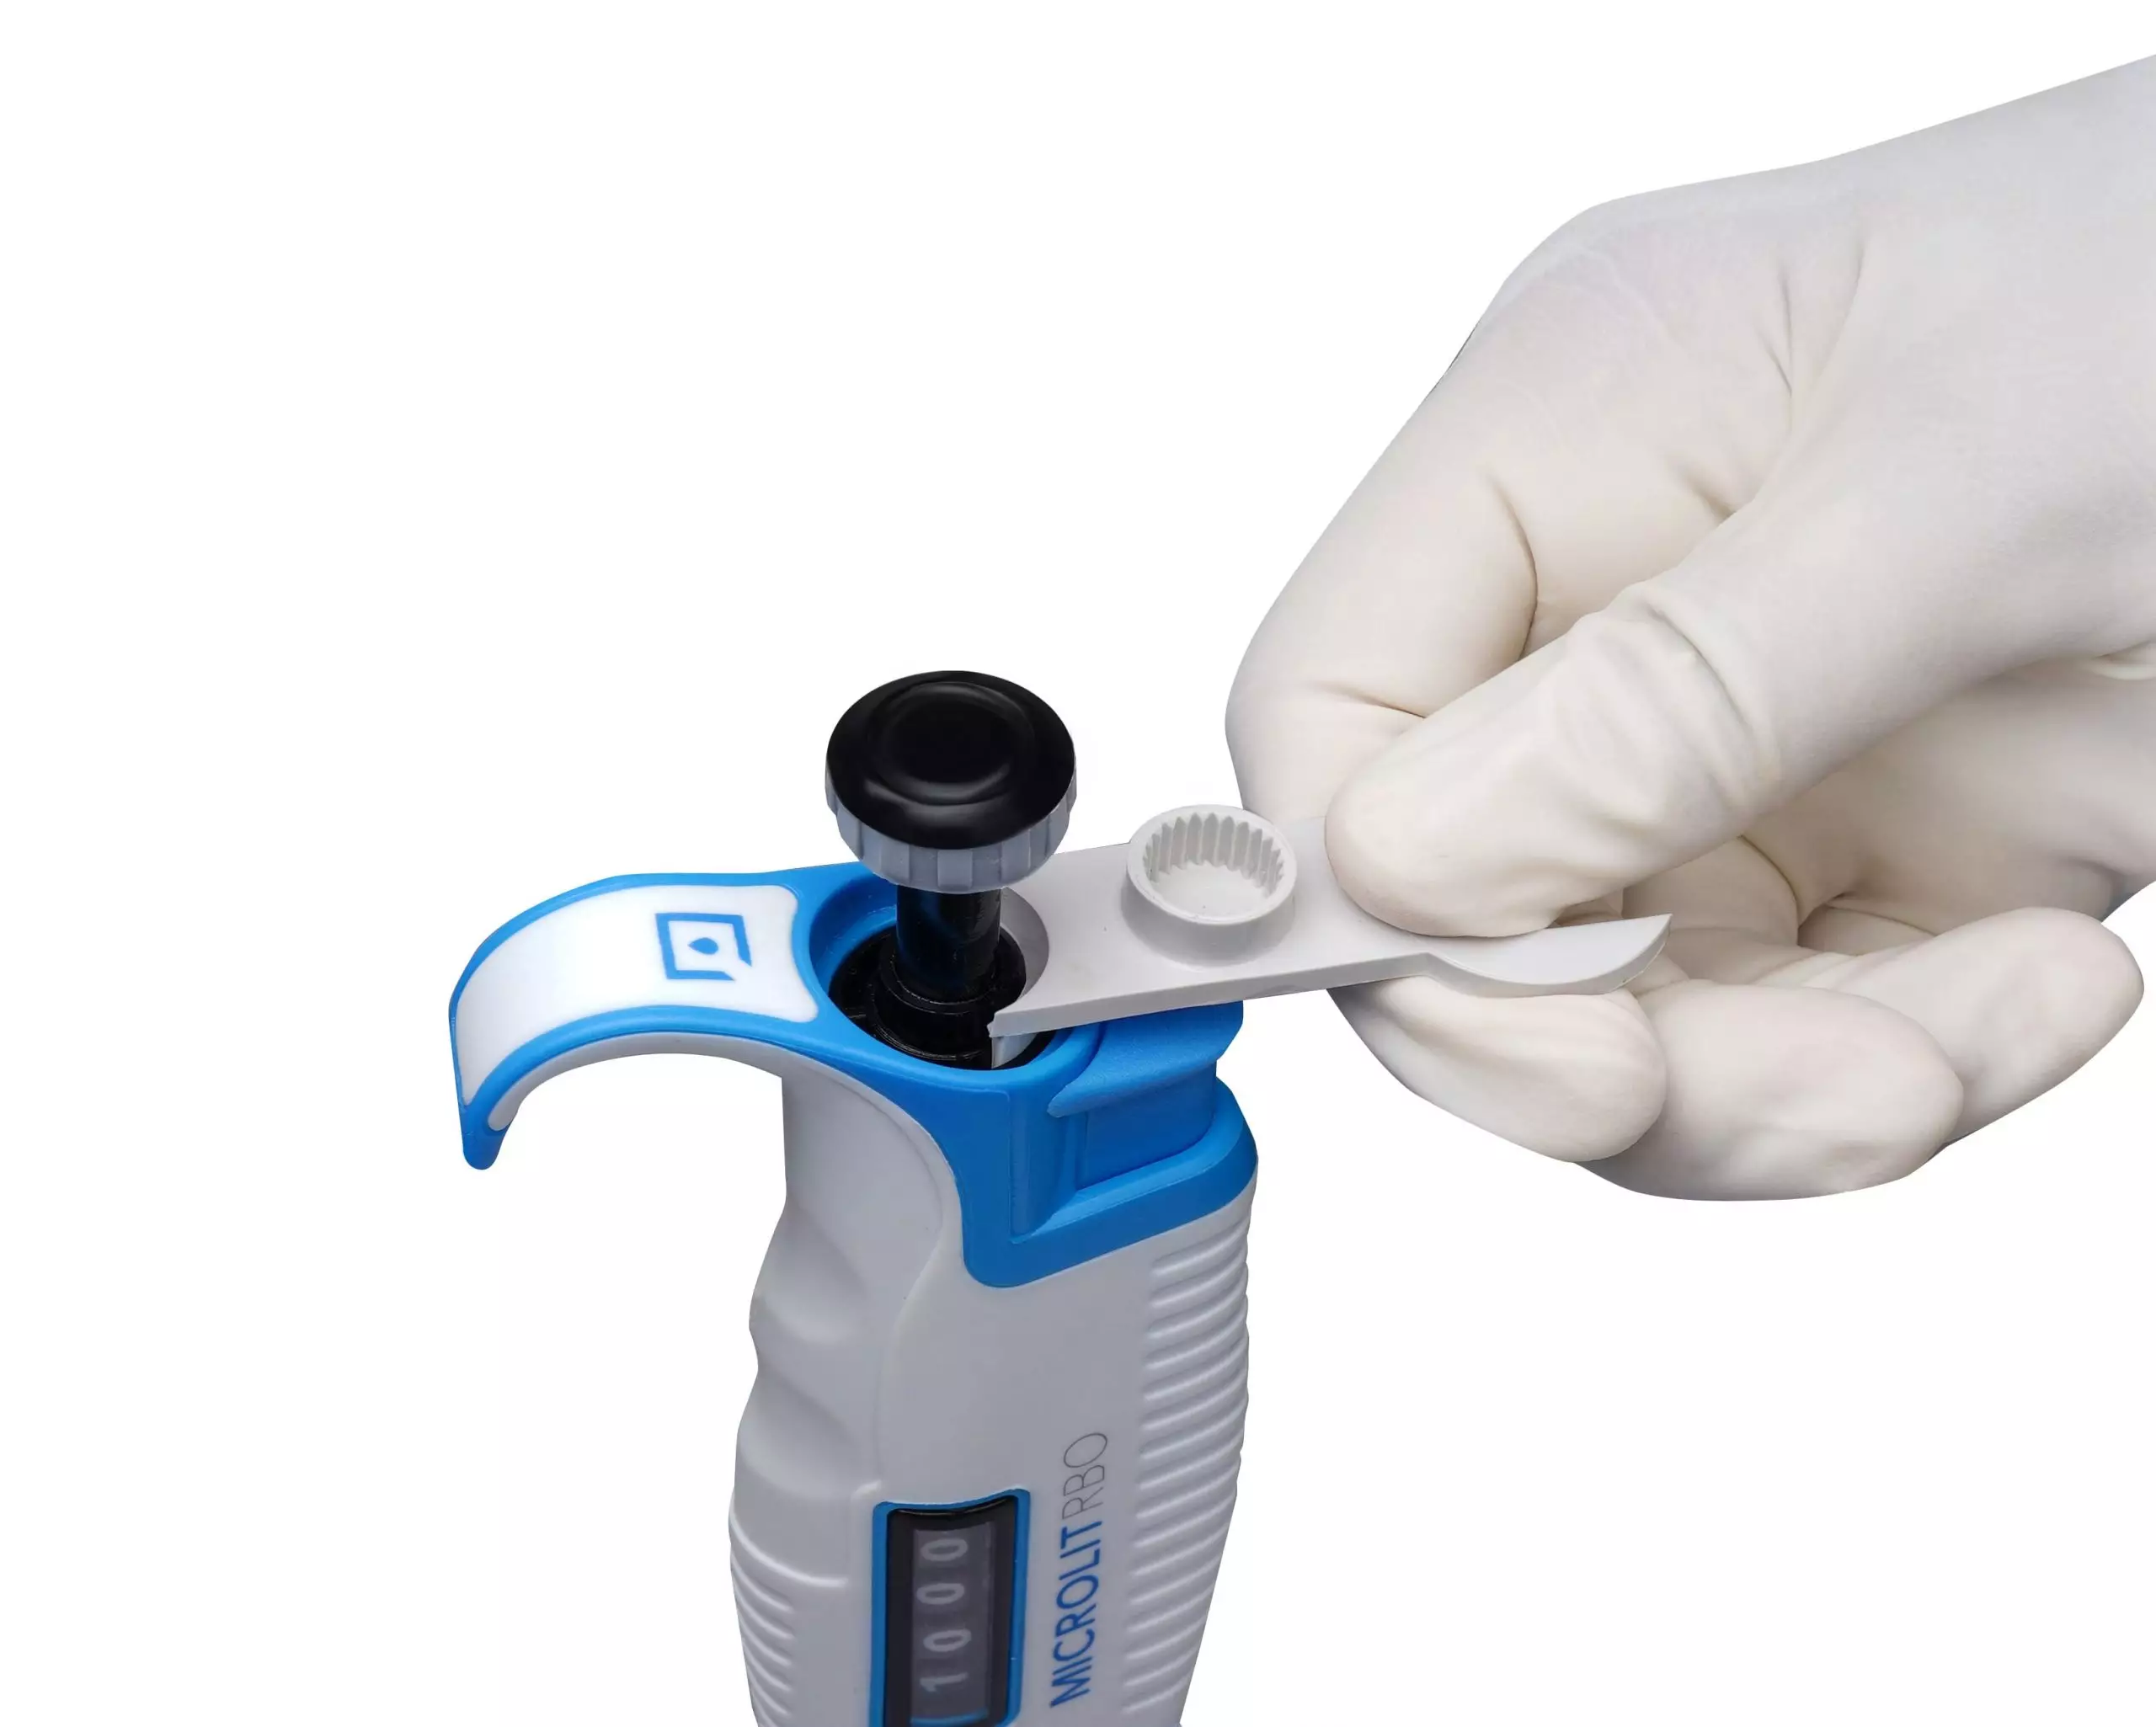
Components of a micropipette
Micropipettes are available in different designs and sizes. However, there are certain components that are basic and common to all the micropipettes. These include the plunger, digital display, tip cone, tip ejector and grippy. Certain micropipettes are provided with a calibration tool and a micropipette stand as an accessory.
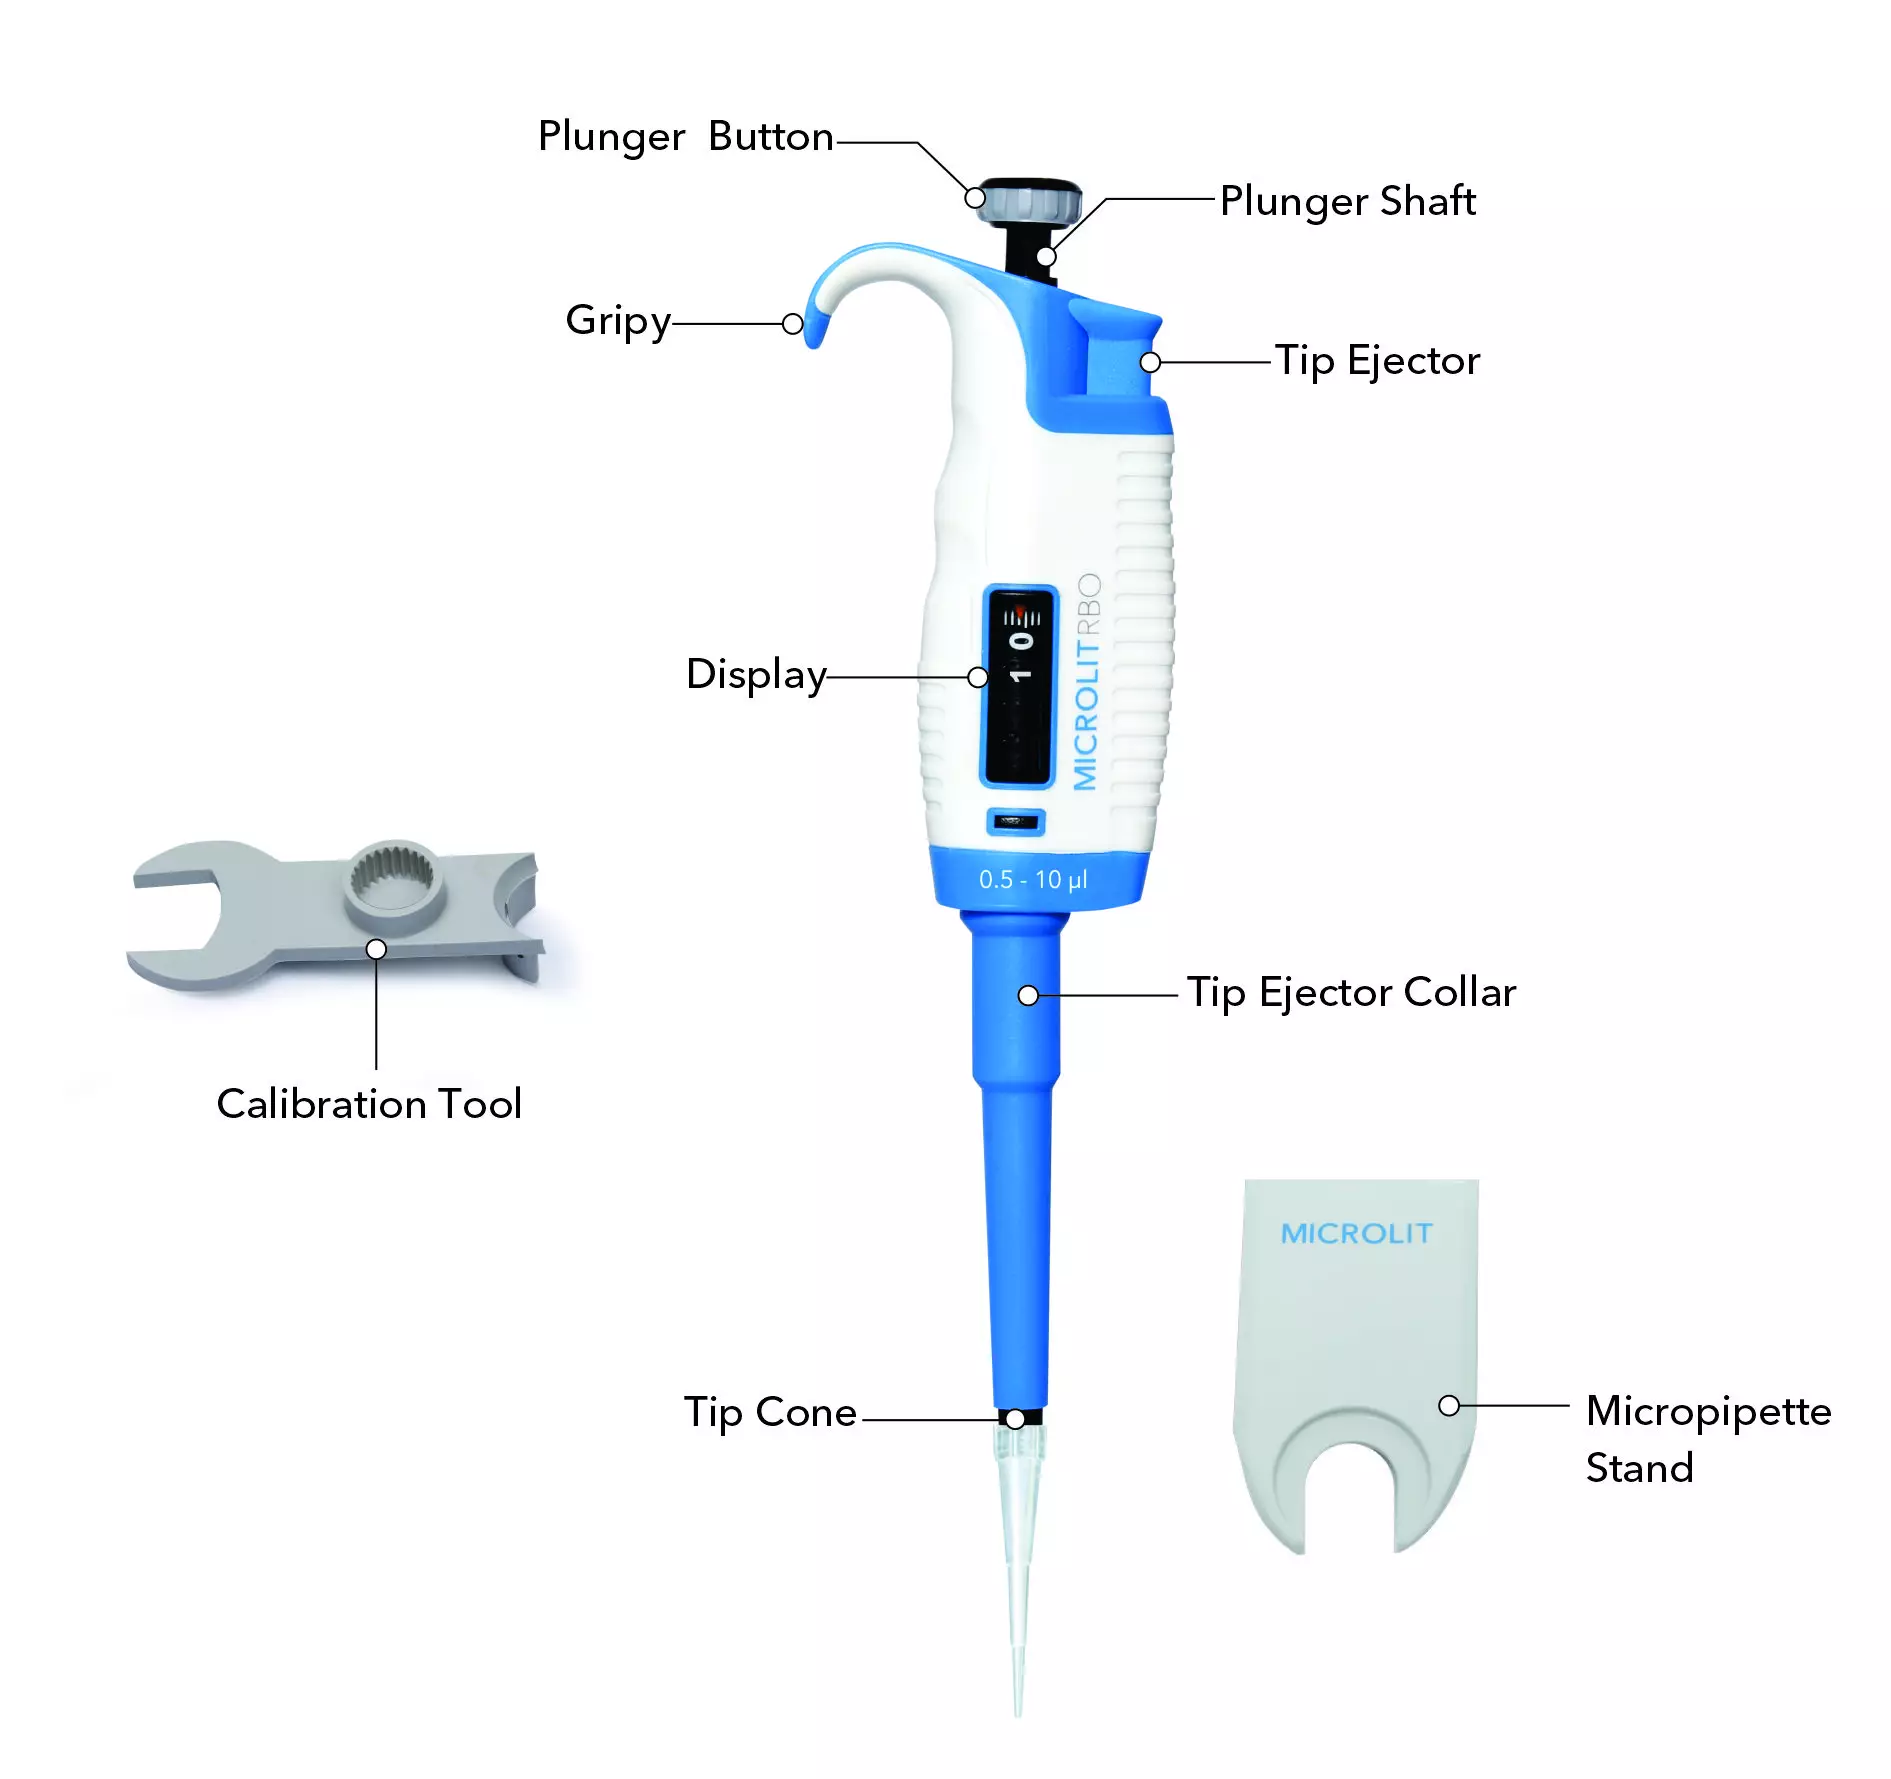
Plunger
The plunger performs the following two functions-
1. Volume adjustment
Rotate the plunger clockwise/ anticlockwise to decrease/ increase the volume setting. A distinct click sound at every volume change ensures perfect volume setting and prevents any accidental volume change.
2. Liquid aspiration/ dispensing
Press and depress the plunger to aspirate or dispense liquid.
Tip Ejector
The internal mechanism of the micropipette does not come in direct contact of the sample/liquid. Instead, a disposable pipette tip is used to draw the liquid into and dispense from the micropipette. So in order to allow the safe, effortless and quick ejection of tips, micropipettes are provided with a tip ejection system. The tips can be easily removed from the micropipette by pressing the tip ejector button.
Volume Display
This shows the volume of the liquid to be aspirated or dispensed.
Tip Cone
The tip cone provides fitment to the tips. A micropipette with a universal tip cone is preferred as it enhances the compatibility of the instrument with most of the standard tips.
Size and Range / Technical Specifications:
Micropipettes are available in different volumes ranging from 0.1 µl to 10,0000 µl. The commonly used variants of single-channel variable volume micropipettes are listed below along with their permissible error limits as specified in the ISO 8655-2 standard.
They are sometimes referred to as P10, P20, P1000, and P5000 pipettes based on the maximum volume that can be aspirated/dispensed using the pipette. For instance, a 0.5-10ul micropipette may be commonly referred to as a P10 pipette.
| Volume Range (ul) | Classification | Increment (ul) | Accuracy (± %) | Accuracy (±ul) | CV (± %) | CV ( ± ul) |
| 0.2-2 | P2 | 0.002 | 2 | 0.04 | 1.2 | 0.024 |
| 0.5-10 | P10 | 0.02 | 1 | 0.1 | 0.5 | 0.05 |
| 2-20 | P20 | 0.02 | 0.8 | 0.16 | 0.4 | 0.08 |
| 5-50 | P50 | 0.1 | 0.8 | 0.4 | 0.4 | 0.2 |
| 10-100 | P100 | 0.2 | 0.6 | 0.6 | 0.2 | 0.2 |
| 20-200 | P200 | 0.2 | 0.6 | 1.2 | 0.2 | 0.4 |
| 100-1000 | P1000 | 1.0 | 0.6 | 6 | 0.2 | 2 |
| 500-5000 | P5000 | 10.0 | 0.6 | 30 | 0.2 | 10 |
| 1000-10000 | P10000 | 20.0 | 0.6 | 60 | 0.2 | 20 |
What are the different pipetting techniques used?
The frequently used pipetting techniques include forward pipetting and reverse pipetting. Before we understand these techniques in detail, the general instructions for pipetting listed below would be noteworthy.
1.Press and release the plunger slowly, at all times, particularly when working with high viscosity reagents/solutions. Make sure that the plunger does not snap.
2.Make sure the tip is firmly attached to the tip cone.
3.Before starting your experiment, fill and empty the tip 2-3 times with the reagent or solution that you will be pipetting.
4.Hold the micropipette in an upright position while aspirating. The Grippy must rest on your index finger.
5.Make sure that the tips, the micropipette and the reagent/solution are at the same temperature.
Forward Pipetting Technique:

1. To aspirate the liquid in the tip, press the plunger to the first stop. Immerse the pipette tip vertically in the liquid.
2. To dispense the liquid, place the tip on the inner wall of the receiving vessel at a steep angle
3. Slowly press the plunger to the first stop to dispense the liquid.
4. To empty the tip completely, press the plunger to the second stop.
5. Wipe the tip on the inner wall while taking the tip out of the vessel.
Reverse Pipetting Technique:

The reverse technique is suitable for dispensing reagents/solutions that have a high viscosity or a tendency to foam easily. It is also recommended for dispensing very small volumes.
1. To aspirate the liquid in the tip, press the plunger to the second stop and immerse the pipette tip vertically in the liquid.
2. Slowly release the plunger while the tip is immersed. The liquid will be aspirated into the pipette tip.
3. To dispense the liquid, place the tip on the inner wall of the tube at a steep angle.
4. Slowly press the plunger to the first stop.
5. Wipe the tip on the inner wall while taking the tip out of the vessel.
Note: Residual liquid remains in the tip. This does not belong to the dispense volume.
*Blow-out Step – Prior to aspiration of liquid, a small volume of air should be aspirated to be used later as a blow-out volume. This blow-out volume is important when trying to completely empty the pipette tip. Some liquid tends to linger in the tip and the blow-out volume provides an extra dispense to ensure the tip is fully emptied.
Repetitive Pipetting Technique:
This technique is intended for repeated pipetting of the same volume. Can only be used with electronic and repeator pipettes.
1. Press the operating button to the second stop.
2. Dip the tip into the solution to a depth of 1 cm, and slowly release the operating button. Withdraw the tip from the liquid, touching it against the edge of the reservoir to remove excess liquid.
3. Dispense the liquid into the receiving vessel by gently pressing the operating button to the first stop. Hold the button in this position. Some liquid will remain in the tip, and this should not be dispensed.
Continue pipetting by repeating steps 2 and 3.
How is a micropipette calibrated?
Micropipette calibration is a very important part of any laboratory’s routine for accurate and precise pipetting results. To ensure accuracy of sampling, it is important to check the pipette calibration every month or in a few months’ gap. Executing a proper micropipette calibration according to ISO 8655 standard requires special ambient conditions. Factors such as air pressure, humidity, temperature and even altitude affect the pipetting results. The below text explains the required material or equipment and all the steps that you need to perform and check the calibration of a micropipette.
Here is a list of things which you will need in order to calibrate a micropipette:
- Micropipette that need to be calibrated & tips
- Distilled Water
- Clean Beaker
- Thermometer
- Distilled Water Density Chart with Temperature
- Semi-Micro Balance with readability of at least 0.0001 g
- Notebook to write down the results
- Calculator
How to calibrate a pipette using a balance
1. Leave the distilled water out for 15-20 minutes to ensure the consistent
temperature.
2. Use the thermometer to measure the temperature of the distilled water.
3. Place empty and clean the beaker on the balance.
4. Take the beaker’s weight.
5. Ensure the micropipette is clean and ready to function.
6. When filling the micropipette up to the volume that will be calibrated (1ml, for
example) with the distilled water, make sure air bubbles are not created in the flask
and in the micropipette.
7. Dispense the distilled water in the beaker using the micropipette.
8. Use the balance to measure the distilled water’s weight.
9. Repeat the process 5-10 times at least and note each measurement.
10. Use the formula V = W * Z to calculate the volume dispensed by the pipette.
W is the weight of the distilled water
Z is the “conversion factor based on the density of the water” and
V is the calculated volume of dispensed water
The temperature of the water determines its density, which is why it is important to
keep the water temperature as constant as possible. Skip if you have software
automatically do that.
11. Average the results. If you did 10 tests, divide the sum of the 10 tests by 10.
12. The average weight of the distilled water is the W in the equation. You can now
solve the equation manually, or use software.
13. The next step is determining the pipette’s accuracy, manually or via software. If you
have to do it manually, use the formula A = 100 x Vavg/V0
A stands for Accuracy.
Vavg is the average calculated volume.
V0 is the value assigned for the pipette to dispense.
It is recommended that the value should be between 99 and 101%.
14. Record the results. If the micropipette is properly calibrated, you can use it. If the
results are consistently wrong, do not use the pipettes or fix before using it again.
How to choose the right micropipette?
As micropipettes can be used for a number of applications, the dilemma one faces is how to choose the right micropipette while handling a specific task.
For this, you can follow our simple, stepwise guide. The preliminary step includes noting down the details of the experiment you are going to perform with the micropipette. This should ideally include the number of samples, the volume to be transferred, the number of replicates, whether sterile conditions are required and so on. Making a comprehensive list in this manner will make the process of deciding which micropipette to use easier.
A. Selecting the Type of Micropipette:
Micropipettes can be mainly categorized into two types – Air Displacement Micropipettes and Positive Displacement Micropipettes. You can choose the right one by matching their applications to the experiment you wish to perform.
B. Next Steps:
After choosing the correct type, let’s look at the sub types available based on criteria like the volume to be handled, quality of tips, manual or electronic pipettes, etc. This is where the more minute details regarding the experiment will come handy.
1. An adjustable micropipette or a fixed micropipette:
You can either use a micropipette whose volume is already fixed or one whose volume can be adjusted as per requirement. If you regularly use a single volume such as 100 µl for your experiments, go for a fixed volume pipette like MICROLIT RBO Fixed Volume (Single Channel). If your experiment entails you to work with a range of volumes, choose the variable or adjustable pipette, like MICROLIT RBO Variable Volume (Single Channel or Multichannel).
2. The volume to be handled:
As a standard rule, it is better to choose the smallest pipette capable of handling the required volume because when the set volume is close to the minimum capacity of the micropipette, the accuracy and precision of the readings decrease.
Single channel or multichannel micropipettes:
This decision can be made based on the number of samples or replicates you are working with. Single channel micropipettes like the MICROLIT RBO Single Channel (Fixed Volume and Variable Volume) are used when the number of samples is less whereas a large number of samples or well plates can be easily handled by multichannel micropipettes like the MICROLIT RBO Multichannel (8-channel and 12-channel).
3. Micropipette Tips:
Once you’ve selected your micropipette, this is the next crucial decision to make. Micropipette Tips can be graduated or not graduated, universal or pipette specific, with filter or without filter, sterile or non-sterile etc. If the experiment requires sterile, aseptic conditions, one should use filtered and sterile tips. Universal tips can be used for a wide range of pipettes. It is also important to match the capacity of the tip with the capacity of the micropipette before use.
4. Accuracy with specific tolerance:
Micropipettes are designed to operate with accuracies within a few percent (generally <5%) of the intended value for the volume. Make sure your micropipette provides the same accuracy as you need for your sampling.
How to clean or sterilize a micropipette?
- The micropipettes can be sterilized by autoclaving them at 121°C (252°F) and 15 PSI for a duration of 15-20 minutes.
- No special preparation is needed.
- You may use steam sterilization bags if needed. After autoclaving, the micropipette must be cooled to room temperature for at least two hours. Before pipetting, make sure that the instrument is dry.
- It is recommended to check the calibration after every sterilization cycle to achieve the best possible precision and accuracy.
When is micropipette calibration required?
In order to maintain the quality of sampling results, the micropipettes must be in good condition and properly calibrated. Normally, the interval at which a micropipette needs to be calibrated depends on many factors:
- Frequency of pipette use
- Type of liquid dispensed by the pipettes
- Handling & care of pipette
- Pipette applications that require superior accuracy also demand more frequent calibration
Regulations and standards published by organizations such as the FDA and ASTM International provides minimum requirements to ensure the quality of laboratory testing results. Regulations specify that all laboratory instruments used in sampling & productions including micropipettes must be routinely calibrated at suitable intervals.
In the same series, the Clinical and laboratory standards institute (CSLI) has been provided the guidelines for single and multi-channel micropipettes that specifies these micropipettes must be calibrated every 3 to 6 months. And a minimum of two volumes must be tested with 10 replicas at both nominal and lowest settings.
Establishing an appropriate calibration frequency minimizes the chances of incorrect liquid delivery in the laboratory and ensures traceability, accountability and confidence in the results.
Applications/fields where micropipettes can be used
Micropipettes are generally used in microbiology, chemistry and medical testing laboratories for the accurate and precise transfer of samples. While the single channel micropipettes are used in labs that perform research related to molecular biology, microbiology, immunology, cell culture, analytical chemistry, biochemistry and genetics, the multichannel micropipettes are recommended for ELISA (diagnostic test), molecular screening, kinetic studies and DNA amplification.
Some of the major fields where micropipette is widely used are:
- Pharmaceuticals
- Health Care
- Food & Beverage
- Environmental Monitoring
- Academic & Research Institutes
- Diagnostic Kits
- Life Sciences
Benefits of using a micropipette
Micropipette is a reliable device to dispense precise quantities of liquid. It increases the performance of the testing efficiently. Some other benefits of using a micropipette are listed below:
- Time Saving
- Ergonomics
- Accuracy & Precision
- Ease of Use
Where do we get the best micropipette for the lab?
Every lab technician wants a micropipette which is ergonomically designed, aesthetically presentable and provides accurate and precise measurement values. Selecting the best micropipette can be a challenging task as the market is full of micropipettes which appear to be good but do not provide reliable test results. Before going with any micropipette brand, it is important to ensure some points that can save you from wrong pipette purchasing:
– Is the micropipette able to handle your pipetting range of liquid?
– Does your micropipette have a universal tip cone for handling all kinds of tips?
– Is your micropipette autoclavable at the required standard temperature?
– Does your micropipette have smooth and comfortable handling?
– Is your micropipette calibrated for precise dispensing?
– Is the accuracy and precision in readings offered by the micropipette in accordance with the ISO standards?
The above points ensure your right micropipette purchasing which will work for a long time and improve the liquid handling activities in your laboratory.
Microlit designs and develops high precision liquid handling instruments for leading laboratories around the world. It offers an advanced and innovative micropipette range that facilitates a remarkable user experience in practical laboratory environments. Visit our whole product range at https://www.microlit.com/products/