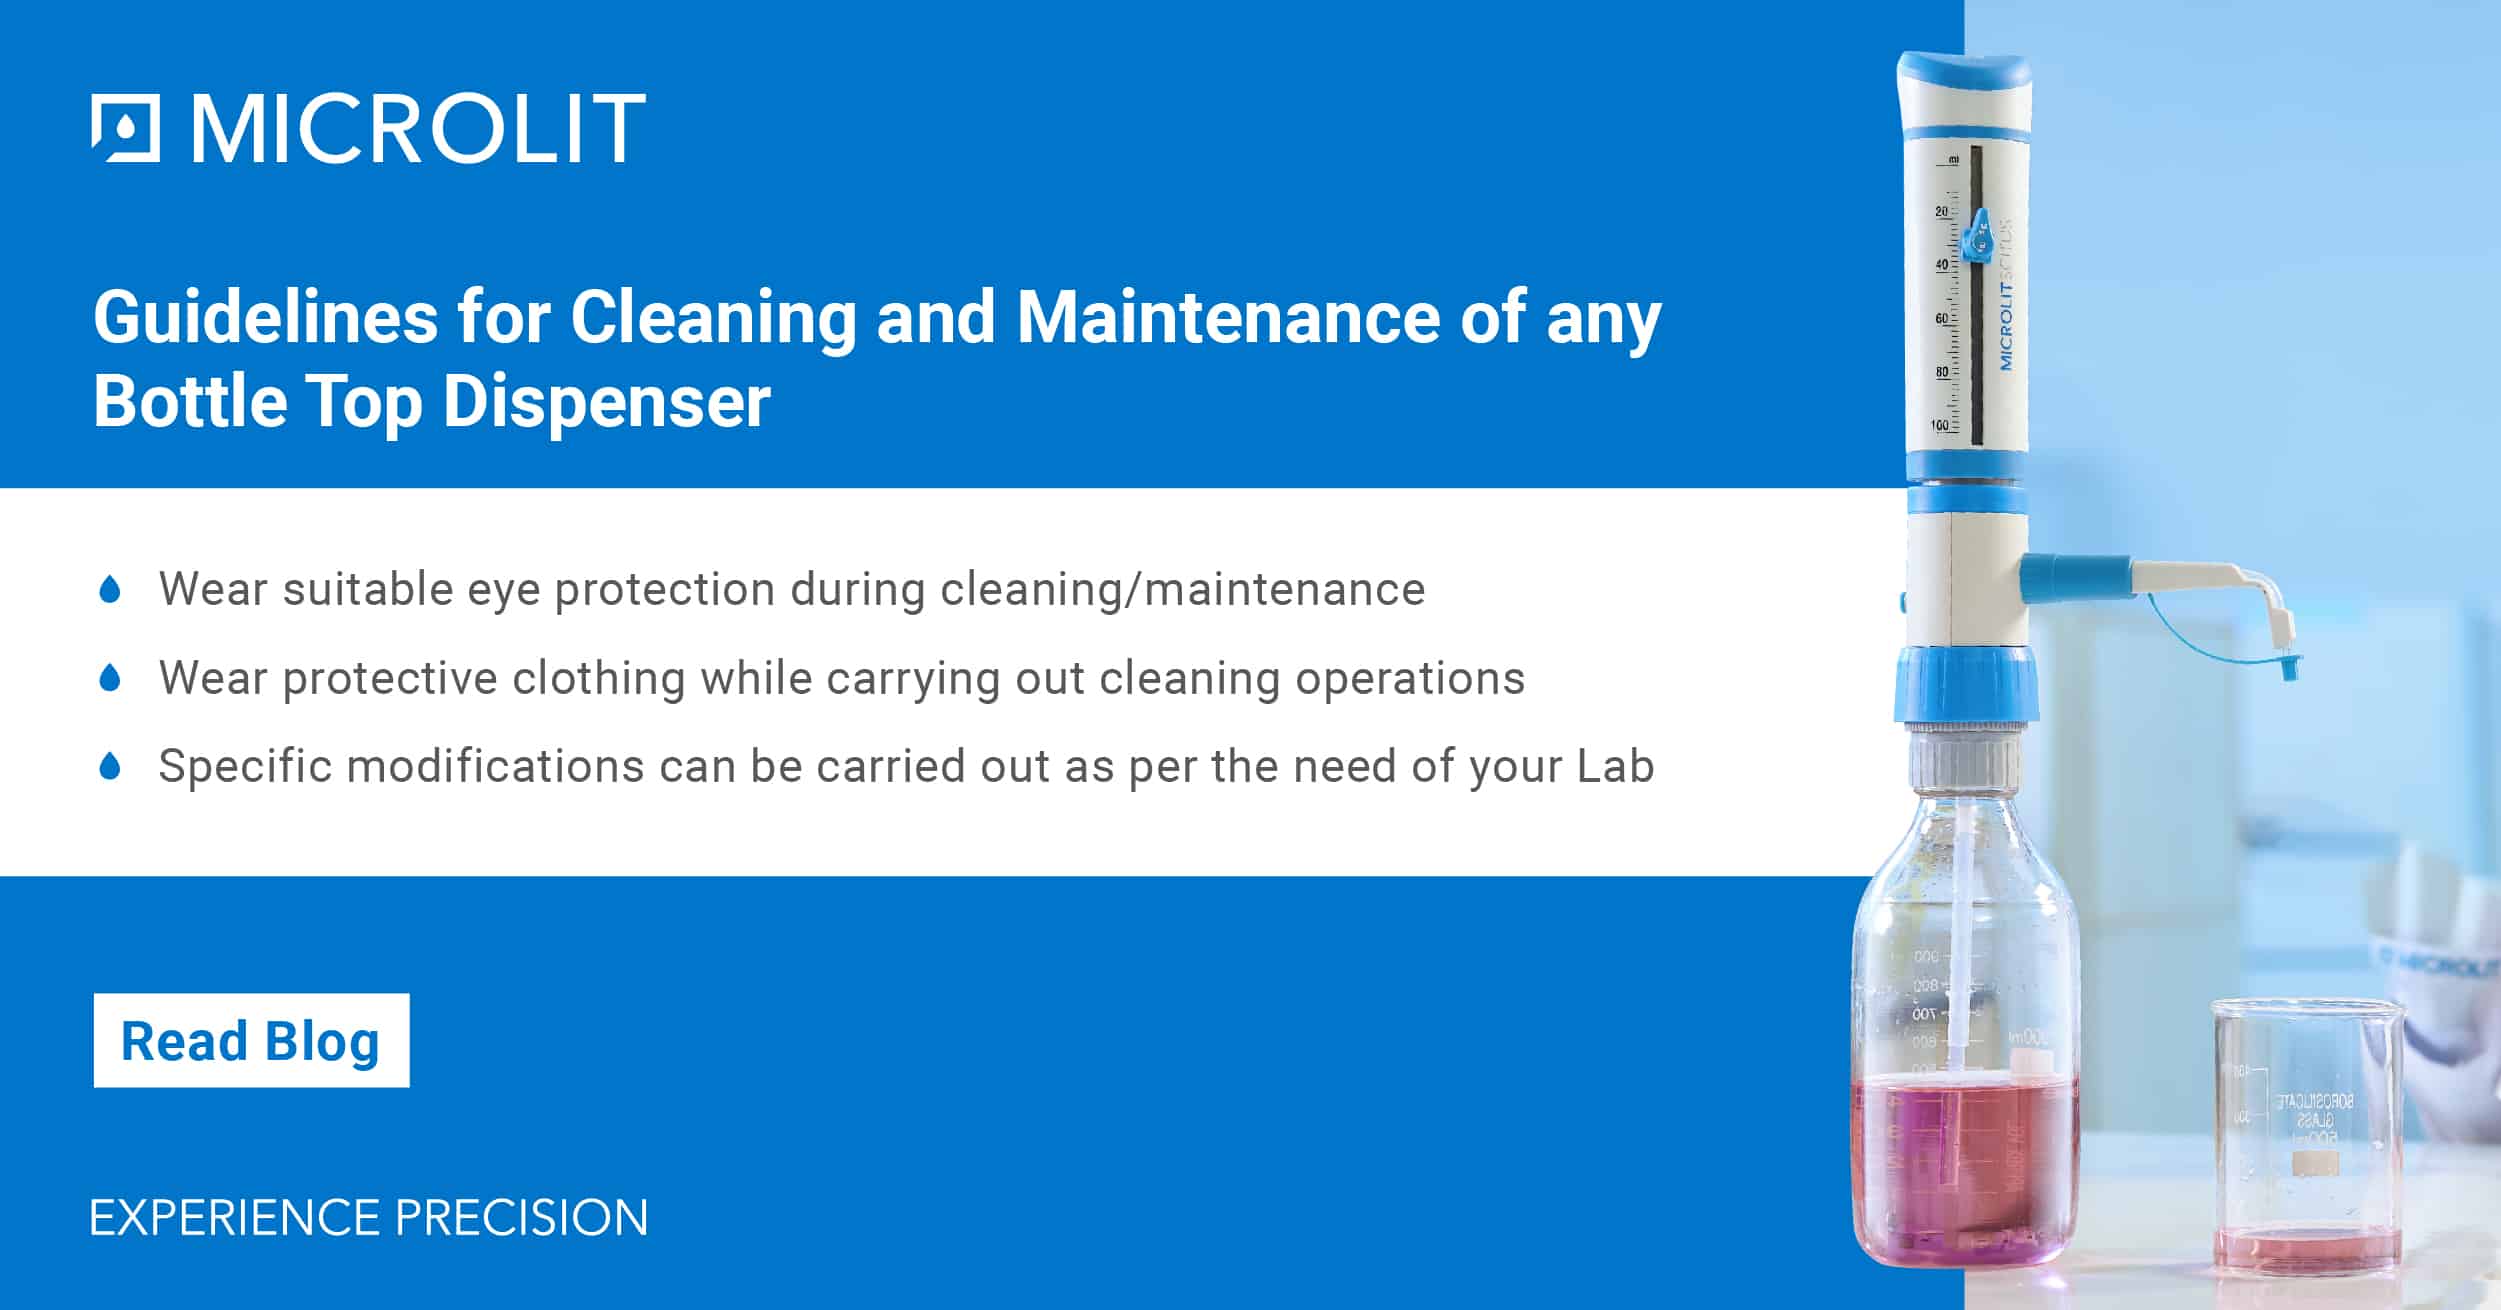
Guidelines for Cleaning and Maintenance of any Bottle Top Dispenser
- April 20, 2023
- ENQUIRE NOW
Bottle Top Dispensers are used with various reagents sometimes with very aggressive chemicals. The residue of any chemical can impact results in a new analysis. Therefore, it is very important to clean bottle top dispensers after use or before using any fresh chemical/solvent/reagent.
Furthermore, some chemicals tend to form crystals on the inside of the dispenser that hinders piston movement and liquid dispensing. So, regular cleaning is mandatory to keep crystals from forming and maintain the long life of the Bottle Top Dispenser.
It is recommended to follow the below-mentioned cleaning procedure to attain excellent results. Specific modifications while cleaning can be carried out based on your needs. All maintenance or cleaning procedures should be carried out while wearing suitable eye protection and protective clothing.
Need for Cleaning or Maintenance
 A Bottle Top Dispenser should be cleaned in the following situations when any of the following happens.
- Immediately when the piston is difficult to move
- Before changing the reagent
- Prior to long term storage
- Prior to dismantling the instrument
- Prior to autoclaving
- Prior to changing the valve
- Regularly when using liquids which form deposits (e.g., crystallizing liquids)
- Regularly when liquids accumulate in the cap
Steps to clean the Bottle Top Dispenser
- Make sure that the instrument is completely empty.
- Place the instrument into an empty sink together with its reservoir.
- Unscrew the threaded platform base from the reservoir and carefully lift the instrument’s intake tube out of the reservoir, tapping it against the reservoir’s aperture to shake off any droplets from the intake tube.
- Hold the dispensing nozzle over the aperture of the reservoir and apply gentle piston strokes in order to return any contents into the reservoir.
- Empty the instrument completely and flush thoroughly with distilled water.
- If the piston barrel is still not completely clean, one needs to disassemble the instrument.
Disassembly and Assembly for Cleaning and Servicing
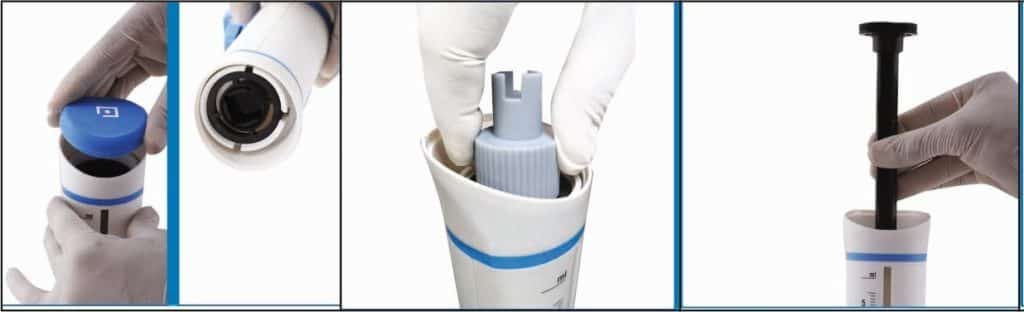
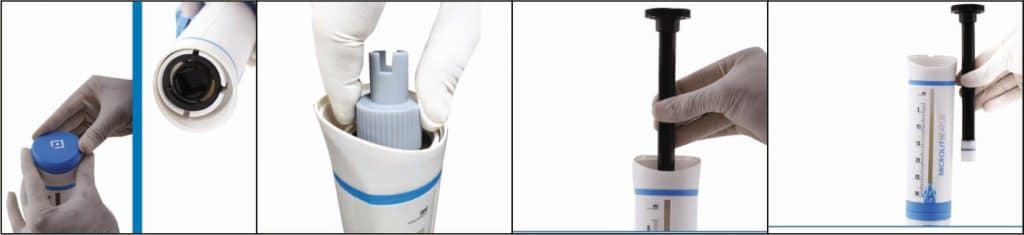
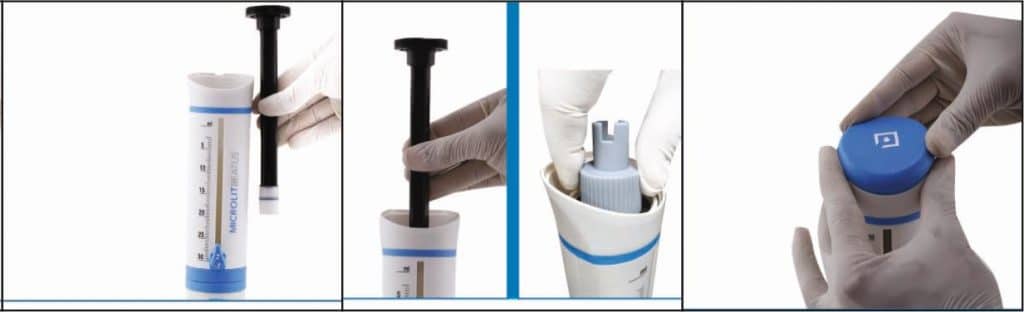
Procedure to disassemble the Piston
- Pull the cap outwards to expose the calibration nut
- Unscrew the calibration nut with the help of calibration tool to disassemble the piston and shaft from the main housing
- After unscrewing, pull out the shaft.
- Rinse the piston and shaft with deionized water.
- Clean the cylinder with a bottle-brush. If necessary, carefully remove deposits at the edge of the glass cylinder.
- Flush all the parts of the instrument with deionized water.
- Insert the piston completely into the cylinder and then reassemble the instrument using the calibration tool by screwing back the piston.
- Snap the cap back to complete the assembly.

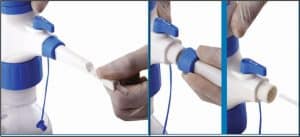
Procedure to disassemble the Delivery Pipe
- Straighten the delivery pipe.
- Unscrew the chuck nut and pull out the delivery pipe
- Clean the pipe with deionized water
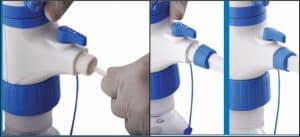
Procedure to re-assemble the Delivery Pipe
- First push the delivery pipe into the lower housing till it stops going in further.
- Screw the chuck nut to complete the assembly.
Autoclaving
Microlit’s Bottle Top Dispenser is fully autoclavable at 250°F or 121°C and 15 psi. They have a holding time of nearly 15 minutes.
Note: Only the piston needs to be removed for autoclaving the instrument. Piston is also autoclavable.
Disassembling for autoclaving
Pull the cap outwards to expose the calibration nut.
Unscrew the calibration nut with the help of calibration tool to disassemble the piston and shaft from the main housing.
After unscrewing, pull out the shaft.
This is the piston shaft sub-assembly.
Autoclave the two sub-assemblies at 121°C and 15 psi pressure for 15-20 minutes.
The volume adjustment knob should always be kept in the ‘Unlocked’ position while autoclaving.
Cooling
After autoclaving, cool the dispenser at room temperature for at least 2 hours before use.
Re-assembling after autoclaving
Insert the piston completely into the cylinder and then reassemble the instrument. Use the calibration tool to screw the piston.
Snap the cap back to complete the assembly.
For any detailed information/demo, please email us at info@microlit.com or visit our website www.microlit.com