Pipetting Small Volumes: 8 Tips to Improve your Technique
- June 4, 2022
- ENQUIRE NOW

Have you ever meticulously planned your workflow, only to find that your results have too much variance, forcing you to redo your experiment? As modern researchers increasingly work with high-value small volume samples, the need for advanced pipetting techniques/protocols is evident. In order to detect microscopic changes accurately in small sample volumes, test tubes and vials are being gradually replaced by microplates, which require reagents in the microliter/nanoliter range.
While working with small volumes, factors such as temperature and dispensing accuracy are critical to control and manipulate. If you want consistent results while working with small liquid volumes, you need to identify and eliminate all potential sources of error and review your lab workflow on a regular basis. Here are some tips for pipetting small volumes accurately.
1. Use Right Pipettes and Pipette Tips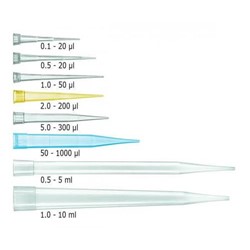
Volumetric errors are amplified at such low volumes. To mitigate these errors, be sure to select the proper pipette that delivers volumes that match your protocol. Be sure to choose the smallest possible pipette for handling the sample volume. For instance, if you are pipetting 2µL of the sample, use a 2.5-5 µL pipette rather than a 10µL one.
In addition, you need to know whether you are using the right kind of pipette for your workflow. For instance, positive displacement pipettes are ideal for handling volatile, viscous, and other kinds of difficult samples. It is advised to go through the manufacturer’s instructional manual while selecting the type of pipette for your experimental needs. Most errors reported in the lab are caused due to liquid volatility or viscosity, and unexpected environmental changes. You must make sure that your pipetting technique aligns with surrounding conditions, sample type and sample volumes.
2. Avoid Foaming and Bubbles
Whether you’re weighing the benefits of popping bubbles with the pipette tip or you’re resigned to starting over, there are some pre-emptive measures you can take to avoid this problem in the first place. Go for reverse pipetting. Although this requires a little extra volume, bubbles and foaming are greatly reduced.
Consider using electronic pipettes and low-retention tips. Technology has come a long way for electronic pipettes, giving you control over blowouts and aspirating/dispensing speeds. Low retention tips compensate for the reduced surface tension of detergent-containing liquids and ensure no sample remains in the tip, leading to increased accuracy and reproducibility.
3. Use the Correct Pipetting Technique 
There are various do’s and don’ts when it comes to using a particular pipetting technique for smaller liquid volumes. For instance, you need to ensure that you hold the pipette at an appropriate vertical position and pull the pipette straight out from the sample container while avoiding touching the vessel’s side surface. For sample volume less than 50 μL, you should avoid holding the pipette at an angle, as it will alter the aspirated volume of the liquid. Further, if you let the pipette tip touch the side of the vessel, it creates a wicking process that lowers the volume of liquid dispensed.
Additionally, it is important that you pause consistently after aspirating and before removing the tip from the liquid. Also, try to use consistent plunger pressure and speed. Depress the plunger smoothly until it comes to rest, immerse the pipette tip and then release it at a constant rate. This is recommended as such repeated actions are likely to produce reproducible results.
4. Check if Pipettes are Calibrated
Be sure the pipettes being used are calibrated appropriately. You can do a quick check using distilled water and a microbalance. Since the density of water is 1g/mL, each microliter of distilled water at room temperature should weigh 1mg.
5. Consider Various Environmental Temperatures
One needs to ensure to take into account various environmental factors, including temperature, pressure and humidity levels of your laboratory while designing your pipetting workflow. Experts recommend that one shouldn’t pipette small volumes at lower temperatures than the ambient temperature in your lab. The ambient temperature of your lab will directly impact the precise volume of the sample pipetted by your instrument, as thermal expansion caused by higher temperatures is likely to increase the air space between the sample and the pipette tip and significantly decrease the volume dispensed.
Equilibrating small volume samples with the lab environment helps to drastically reduce volumetric errors, as well as prevent over-dispensing of cold liquids. In addition, you can use a positive-displacement pipette while working with extremely cold or hot liquids to maintain greater levels of precision and accuracy.
6. Pre-Wet the Pipette Tips
Evaporation is always an issue when handling liquids, and the effects are magnified when working with small volumes. Use plastic plate covers after you are done or if you need to take a break. The plate remains covered until you are ready to use it. Alternatively, you can use parafilm or sealing tape to help prevent evaporation.
In order to aspirate and dispense small volume samples correctly, you must pre-wet the pipette tips before you begin the pipetting workflow. Pre-wetting essentially involves immersing the pipette tip in the liquid before performing the consequent pipetting steps.
Despite using a validated pipetting technique, failure to pre-wet the pipette tips can lead to increased evaporation and reduced delivery volumes. Pre-wetting the pipette tips enables you to dispense accurate and precise liquid volumes by increasing the humidity levels inside the chamber, thereby limiting liquid evaporation while the pipetting procedure is carried out.
7. Use the Correct Immersion Depth
Before aspirating, it is important that you immerse the tip properly below the meniscus. For large volume pipettes (1-5 mL), the immersion depth should be at least 5-6 mm, while for smaller volume pipettes, the depth should be around 2-3 mm.
If you immerse it too little, specifically the large volume pipettes, it can result in the aspiration of air. On the other hand, if you immerse it more than necessary, it can make the liquid stick to the pipette tip surface, leading to volumetric errors.
8. Thoroughly Mix the Contents
When handling small volumes, mixing is particularly important as handling mistakes are much more obvious. When mixing by pipetting, be sure to set the volume on your pipette equal to at least half the volume in the well you want to mix. Another way to mix low volumes is with the use of an orbital shaker. They gently mix the contents of the well without introducing bubbles.
Although pipetting small volumes can be cumbersome and mind-numbing at times, these tips will help you get accurate and reproducible results without causing a headache. If you ignore any of the above-mentioned variables, the chances of errors creeping into your workflow can increase dramatically, leading to unreliable results.
As the sample volume gets smaller, the impact of its physical properties, surrounding temperatures and pipetting techniques become increasingly prominent, making the pipetting workflow quite daunting. Following the best practices and taking care of a few key aspects is likely to improve your pipetting technique and help you obtain the highly accurate results you are looking for! Explore the exclusive range of Microlit’s micropipettes at https://www.microlit.com/product-category/micropipettes/ or email at info@microlit.com for any query.