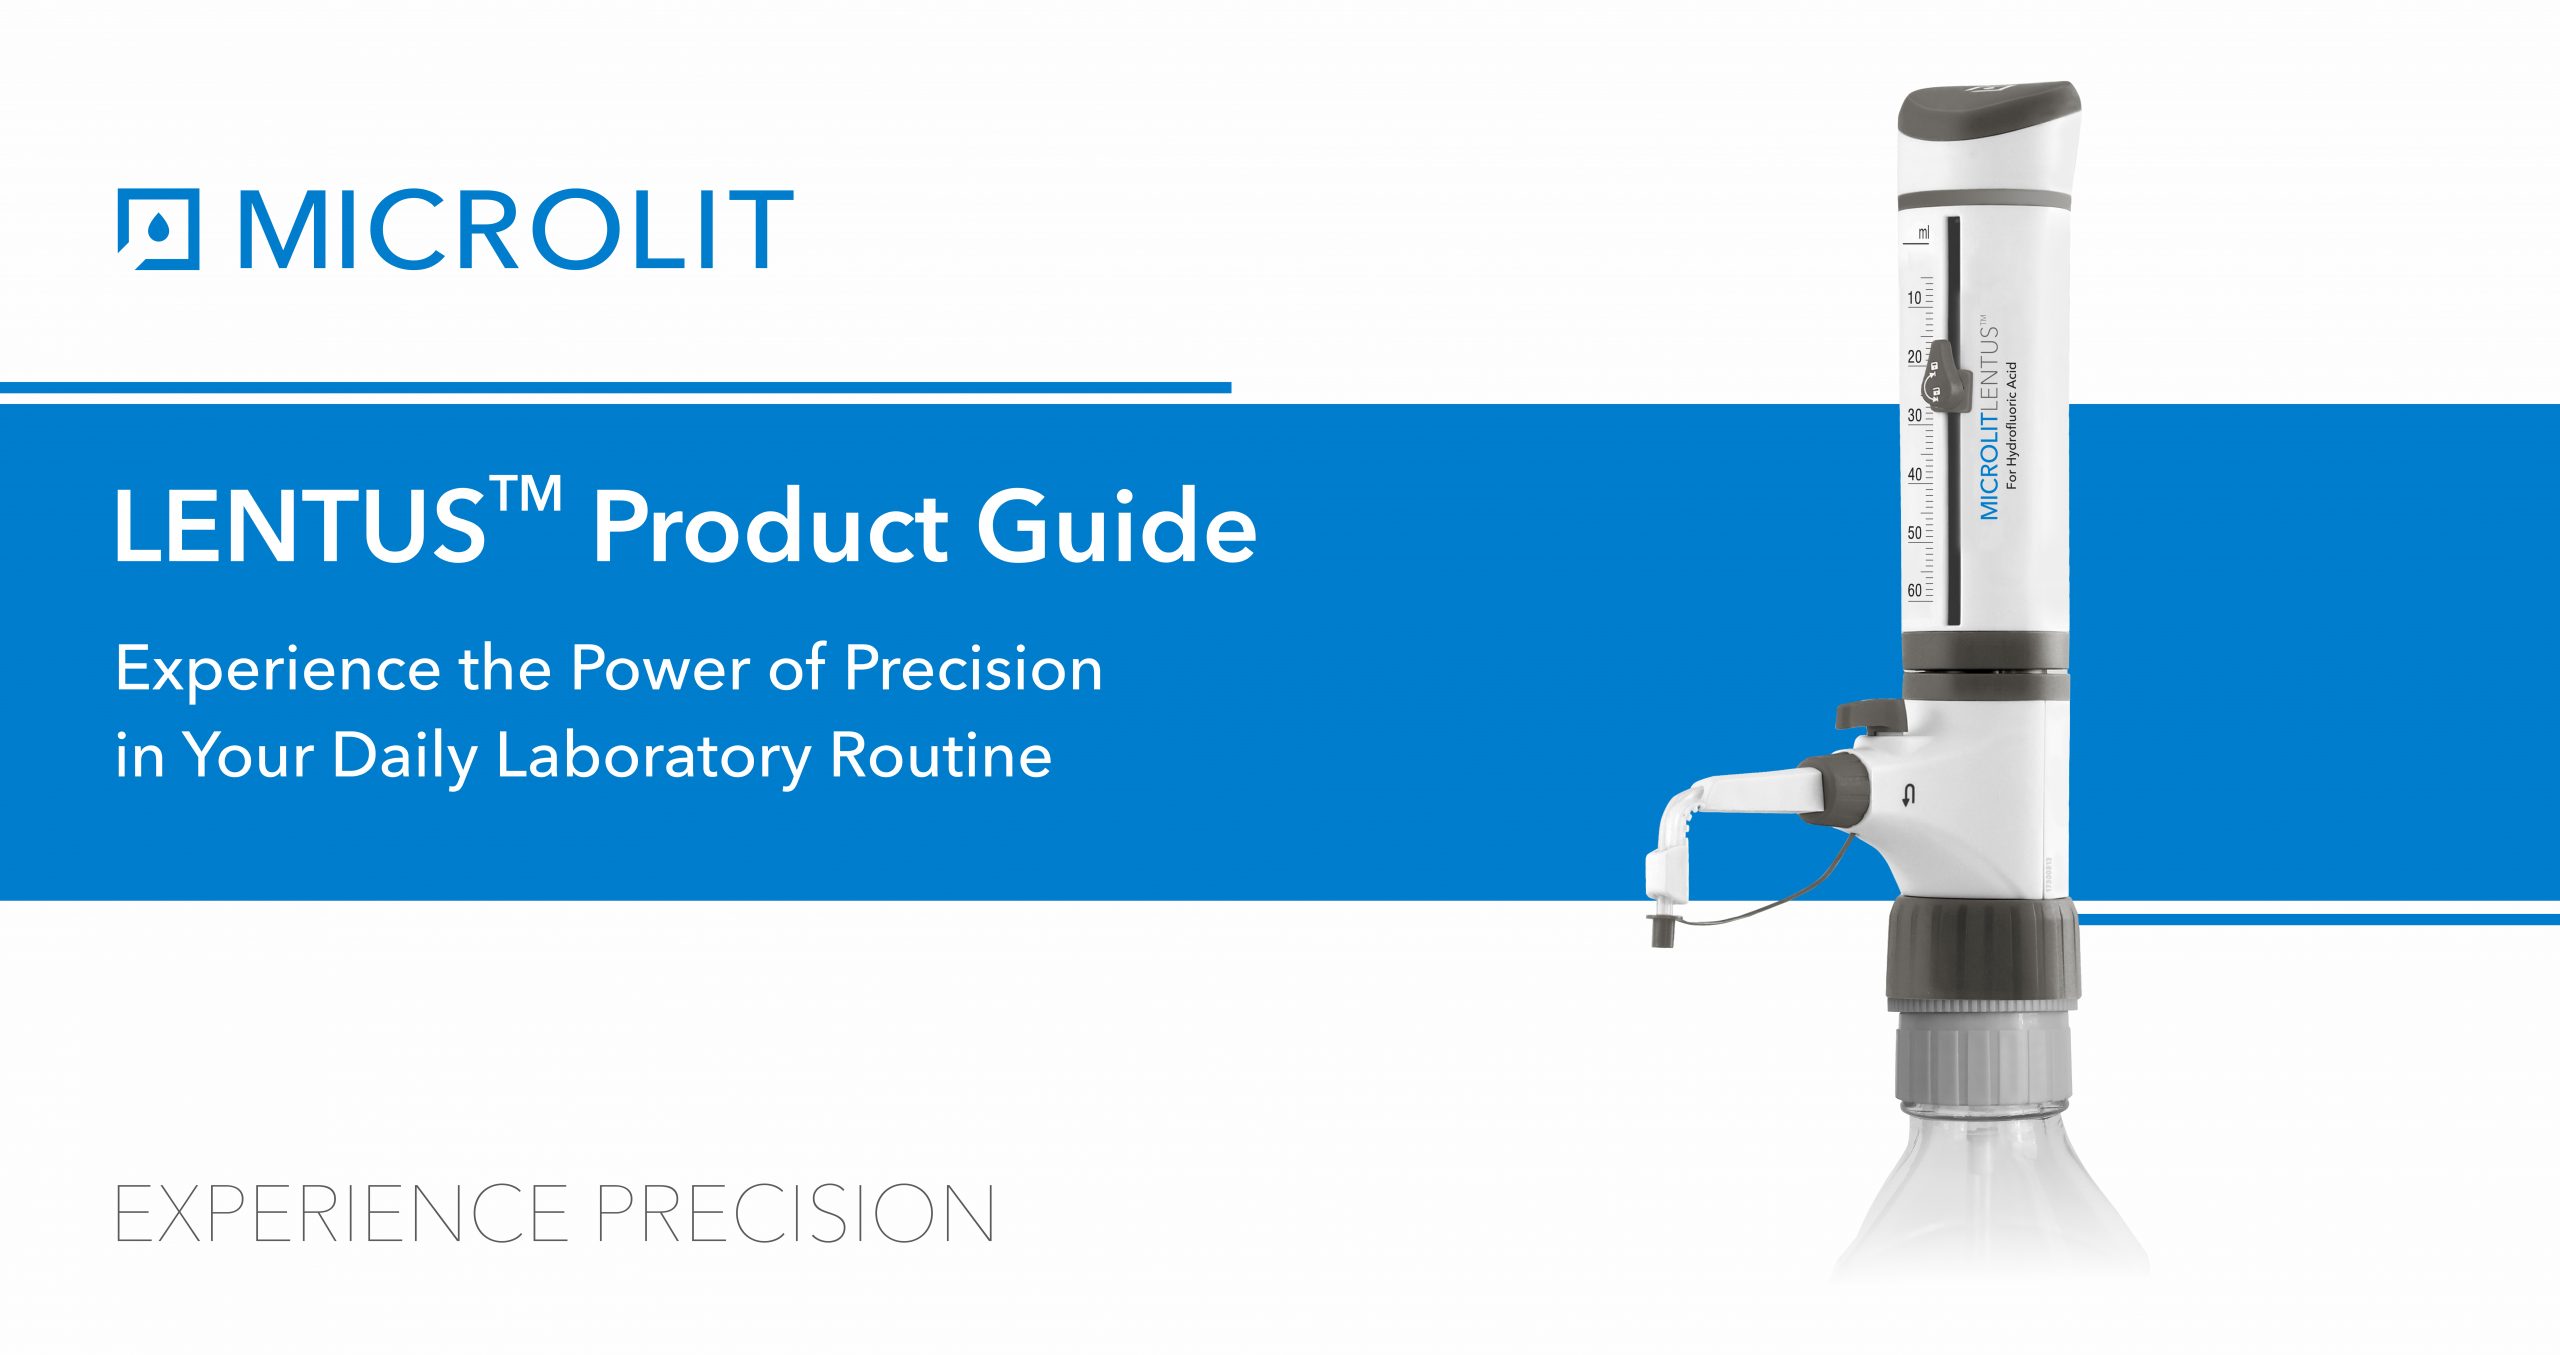
LENTUS Product Guide
- March 1, 2023
- ENQUIRE NOW
What is LENTUS® Bottle Top Dispenser?
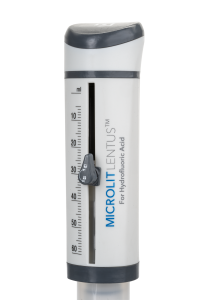
 A high-precision liquid handling tool, the Microlit LENTUS® is engineered with perfection to be used with highly corrosive acids like Hydrofluoric acid, Nitric acid, Sulfuric acid and many others. This Bottle Top Dispenser is mainly used for handling and dispensing high-purity media along with acids and bases. While conducting experiments, this Bottle Top Dispenser exhibits top-notch chemical compatibility and gives accurate results. Not just hydrofluoric acid, it works well with other chemicals and reagents to achieve precision while taking care of safety in real laboratory environments. It is readily available in five unique volume ranges.
It is incorporated with Springless Valve™ and Recirculation Valve technology. This is an ideal choice that prevents the loss of chemicals or reagents while performing experiments. It helps in achieving accuracy with reliability in labs. It is an advanced liquid handling tool that is an ultimate blend of sophisticated features and functionalities.
LENTUS® or HF Bottle Top Dispenser promotes jam-free functioning. It comes with two product innovations, EasyKnob™ and FlexiNozzle™, contributing to flexibility and ease of use. When high-purity materials are dispensed with LENTUSTM after appropriate cleaning, they release virtually no metal ions. This makes the dispenser suitable for trace analysis.
Features of LENTUS® Bottle Top Dispenser
While handling harsh chemicals like Hydrofluoric acids, nitric acid, sulfuric acid, hydrochloric acid, LENTUS® Bottle Top Dispenser can be used to facilitate a wide range of actions.
Change Volume with EasyKnob™
It features the newest technology called EasyKnob™. It allows easy 180° rotation for effortless volume setting for ease of use.
Move effortlessly with a PTFE Piston
This dispenser features a PTFE Piston along with the ETP O-Ring. It ensures effortless and smooth movement. It also makes sure of high chemical compatibility.
Re-direct Liquids with Recirculation Valve
The recirculation valve present in the LENTUS® Bottle Top Dispenser prevents any loss of reagents when purging takes place by re-directing it into the mounted bottle. It also facilitates no-bubble dispensing.
Operate Jam-free with Springless Valve™
It features an award-winning technology called Springless Valve™ which ensures easy and jam-free movements.
Dispense Easily with FlexiNozzle™
It comes with another promising technology, FlexiNozzle™, an adjustable nozzle that ensures easy flexibility and facilitates easy and smooth dispensing at various dispensing angles.
Work Flexibly with a 360° Adapter
The adapter allows 360° rotation ensuring complete flexibility and easy movements.
Assured Quality with ISO 8655 Conformed Calibration
According to ISO 8655 standards, Microlit’s LENTUS® is calibrated in an ISO 17025-accredited laboratory. In the product package, a calibration certificate is also included.
Work with a Comprehensive Volume Range
LENTUS® Bottle Top Dispenser is primarily available in five broad volume ranges.
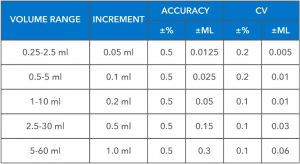
Applications/Technical Specifications of LENTUS®
Here is the table showcasing the technical specifications of the LENTUS® Bottle Top Dispenser:
Autoclaving Parameters
It is fully autoclavable at 15 psi and 121°C for a duration of 15-20 minutes.
Chemical Compatibility of LENTUS®
The Microlit team has developed innovative equipment to ensure the easy and safe handling of corrosive reagents. The traditional Bottle Top Dispensers were not able to dispense corrosive liquids effectively. They tend to erode, form cracks or even lead to significant accidents. As a result, a better version came into play. Microlit LENTUS® is an improved version of the existing dispenser design. It is a Bottle Top Dispenser composed of tested materials to ensure the accurate dispensing of corrosive chemicals in the requisite quantity.
Various Industries where LENTUS™ Bottle Top Dispensers are used
LENTUS™ Bottle Top Dispensers find widespread use in various industries. Mainly, in processes where corrosive or hazardous fluids need to be transferred seamlessly without posing any exposure hazard to the individuals handling them. At the same time, they make sure to maintain volume accuracy. Moreover, this Bottle Top Dispenser is of significant value in the pharmaceutical, research and development industries to conduct qualitative and quantitative assessments. The industry’s strict quality maintenance and protocol requirements make it imperative. It is where this product provides the most value and acts as the next major upgrade in the field.
- Glass industry
- Oil and Gas
- Polymer manufacturing
- Earth sciences (Geology)
 Pharmaceutical
- Metal Pickling
- Uranium / Atomic Energy
- Pesticides and fertilizers
- Environmental Testing
- Food & Beverage Testing
- Semiconductor Testing
- Clinical Diagnostics
- Mining
- Cosmetics
- Chemicals manufacturing
- Consumer products (FMCG)
What is so special about LENTUS®?
Chemical Compatibility – A regular Bottle Top Dispenser can dispense different types of reagents like organics, inorganics, solvents etc. However, Microlit LENTUS™ is engineered with perfection to be used with highly corrosive acids like Hydrofluoric acid and high-purity media along with acids and bases. LENTUS™ is a Universal Dispenser for all reagents – acids, organics, inorganics, solvents including HF. While conducting experiments, the LENTUS™ Bottle Top Dispenser exhibits top-notch chemical compatibility and gives accurate results.
Material of Construction (MOC) – A regular bottle top dispenser is generally equipped with a glass barrel, PFA coated or PTFE piston which makes the dispensers compatible with most of the acids, bases and solvents and facilitates smooth and effortless movement. The materials used in LENTUS™ Bottle Top Dispenser ensure that it is not affected by direct contact with corrosive acids and does not allow the introduction of trace elements in the dispensed liquid. For use with HF, Microlit R&D team tested numerous materials including ceramics, glass, FEP etc. for different components including barrel, valve system and delivery tube. LENTUS™ Bottle Top Dispenser has no glass components inside it, and the material of wetted internal parts include PTFE, FEP and Alumina Ceramic (Chemical formula – AL2O3).
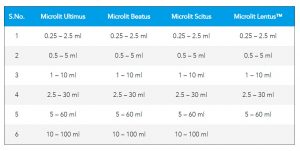
Volume Range – A regular Bottle Top dispenser is generally available in different volumes ranging from 0.25ml to 100ml. However, LENTUS™ bottle top dispenser is available in 5 unique volume ranges up to 60ml. Ref below chart of all Microlit’s Bottle Top Dispensers with various volume ranges. Users can choose as per the requirement of their Lab.
Price – The LENTUS™ bottle top dispenser is budget-friendly as compared to other international brands as expensive inert materials are used for the barrel and valve system like Fluoropolymers and high-purity ceramics to dispense highly corrosive chemicals and acids.
Color of Product – The LENTUS™ bottle top dispenser has unique grey-colored components that act as standouts compared to a regular bottle top dispenser with orange or blue colored components.
How to Use LENTUS® Bottle Top Dispenser
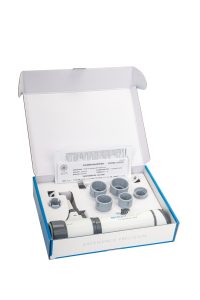 First Steps: First and foremost – check that the package includes the following:
- 1 Bottle Top Dispenser,
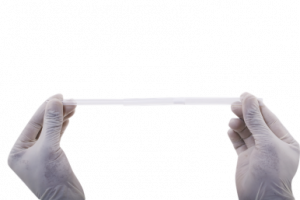
- 1 Telescopic tube,
- 1 Calibration tool,
- 5 Bottle adapters (28mm, 32mm, 38mm, 40mm, 45mm),
- 1 Calibration Certificate
- 1 Product Operation Manual
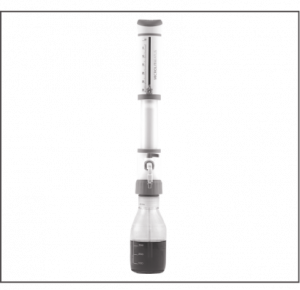
Setting Up: Wear protective clothing and protective gear for the eyes and hands. Follow all the safety instructions carefully and observe safety measures and limitations to minimize risk factors. Let’s start with the below steps:
- Adjust the telescopic tube’s length to fit your reservoir. If you need a longer tube, it can be sent on a request.
- Once the telescopic tube is adjusted, the end of the tube has different diameters. Make sure you’re selecting the right side for your LENTUS®.
- Choose the right fitted adapter for the bottle. The base of the threaded platform has a 30 mm screw thread. Five adapters are supplied to suit containers: the 28 mm, 32 mm, 38 mm, 40 mm, and 45 mm screw neck. Also, there is an inbuilt adapter of 30 mm.
- Fix the adapter properly.
- Once the adapter is fixed properly, mount the LENTUS® instrument and screw it tightly with the reservoir by applying gentle pressure. If you want to remove it, follow the same technique to the base; however, in the opposite direction.
- When the cap is on, avoid pressing the piston down. Avoid splashing the reagent.
- Make sure you wear all protective gear and gloves while handling liquids to avoid accidents. Always wear rubber gloves while operating the instrument or handling the bottle, especially when working with hazardous liquids.
- When mounting the instrument, make sure you carry it with utmost care and precision.
- The instrument is set up and ready to use.

Priming: The next step comes the priming –
- Start by opening the cap of the dispensing tube. Make sure you do it with care.
- Set the valve settings to ‘Recirculate’.
- For the priming, gently pull the piston upward (approximately by 30mm) and then take it downwards to the lower end.
- Repeat this procedure five times in a row.
- Make sure you turn the valve to ‘Dispense’.

Volume setting and Dispensing
It is easy to operate the volume adjustment knob. There are mainly two positions of the knob. These include –
Position 1 – Locked
Position 2 – Unlocked
So, to set the volume, follow these five simple steps:
- Rotate the knob in the anticlockwise direction to unlock it.
- The slider is now loose and can be moved up and down.
- Set your required volume by aligning the pointer using a scale.
- In order to lock the set volume, turn the knob to position 1 from position 2 by rotating it clockwise.
Note: Over rotating the knob may lead to breakage.
Dispensing: Wear a protective layer of gloves and clothes to protect your hands and eyes. In order to avoid any splashes, dispense the liquid slowly. Observe limitations and stick to all safety instructions.
- Remove the cap from the discharge tube.
- Before using the instrument, make sure you turn the valve to ‘Dispensing’.
- Hold the discharge tube orifice against the inner wall of the appropriate receiving vessel.
- Lift the piston gently to the upper end. Press the piston downwards slowly and steadily with minimal force until the lower end.
- Wipe off the discharge tube against the inner wall of the receiving vessel.
- Reattach the cap to the discharge tube.

User Calibration Procedure:
The Microlit LENTUS® Bottle Top dispenser is calibrated at its nominal volume. Due to regular changes in the environmental conditions and the media’s viscosity, it is recommended to undergo gravimetric volume testing every 5-12 months.
Re-Calibration
- Set the LENTUS® instrument to the most used or nominal volume. Stick to the common calibration rules used in statistical quality control. Follow the common rules for calibration used in statistical quality control.
- Set the volume and dispense 5 volumes of the distilled water at 20°C on the electronic balance to establish the real mean volume of the dispensed volume. In case there is a difference between the gravitational average, re-calibrate the instrument.
- In order to re-calibrate, pull the cap in the outward direction to expose the calibration.
- Turn the calibration knob in the clockwise direction using the calibration tool to reduce the overall volume. Later, turn it anticlockwise to increase it.
- To reach the desired position, repeat this procedure till the desired volume is achieved on the electronic balance.
Maintenance and Cleaning: Microlit LENTUSTM should be cleaned in the following situations:
- Immediately when the piston is difficult to move
- Before changing the reagent
- Prior to long term storage
- Prior to dismantling the instrument
- Prior to autoclaving
- Prior to changing the valve
- Regularly when using liquids which form deposits
- Regularly when liquids accumulate in the cap
Note: All maintenance/cleaning procedures should be carried out while wearing suitable eye protection and protective clothing.
- Make sure that the instrument is completely empty.
- Place the instrument into an empty sink together with its reservoir.
- Unscrew the threaded platform base from the reservoir and lift the instrument’s intake tube carefully out of the reservoir, whilst tapping it against the reservoir’s aperture to shake off any droplets from the intake tube.
- Hold the dispensing nozzle over the aperture of the reservoir and apply gentle piston strokes in order to return any contents into the reservoir.
- Empty the instrument completely and flush thoroughly with distilled water.
- If the piston barrel is still not completely clean, one needs to disassemble the instrument.
Cleaning for Trace Analysis
The HF bottle top dispenser is great for trace analysis. Since the instrument offers precise volume dispensing of high purity, it is ideal to be used for trace analysis.
It is recommended to follow the below-mentioned cleaning procedure to attain excellent results. Note that specific modifications can be done based on your needs.
Step 1: Mount the bottle top dispenser on the bottle containing Acetone. Prime it carefully and then fill it completely. Leave the piston at the upper stop and close the dispensing nozzle with the nozzle cap.
Let the dispenser stand in position for approximately 24 hours. After this, perform dispensing twice, then completely empty the dispenser and rinse it 5 times with pure water.
Step 2: Mount the bottle top dispenser on a bottle that contains 20% Hydrochloric acid. Prime it carefully. Leave the piston at the upper stop and close the dispensing nozzle with the nozzle cap.
Step 3: After approximately 24 hours contact time, perform dispensing twice and then completely fill the dispenser again.
Step 4: Repeat Step 3 for two more times.
Step 5: Repeat Steps 2, 3 and 4 with 30% Nitric acid.
Step 6: Mount the dispenser on the bottle filled with the desired dispensing medium, prime the dispenser and then fill it completely. Leave the piston at the upper stop and close the dispensing nozzle with the nozzle cap.
Step 7: After approximately 24 hours of contact time, perform dispensing twice and then completely fill the dispenser again.
Step 8: Repeat Step 7 for two more times. After another approx. 24 hours contact time, perform dispensing twice and then leave the piston at the lower stop.
Note – In case you feel the cleaning procedure is not sufficient, follow these steps again.
Disassembling and Assembling for Cleaning and Services
Procedure to disassemble the piston:
- Pull the cap outwards to expose the calibration nut.
- Unscrew the calibration nut with the help of a calibration tool to disassemble the piston and shaft from the main housing.
- After unscrewing, pull out the shaft.
- Rinse the piston and shaft with deionized water.
- Clean the cylinder with a bottle brush. If necessary, carefully remove deposits at the edge of the glass cylinder.
- Flush all the parts of the instrument with deionized water.
- Insert the piston completely into the cylinder and then reassemble the instrument using the calibration tool by screwing back the piston.
- Snap the cap back to complete the assembly.

Procedure to disassemble the delivery pipe:
- Straighten the delivery pipe.
- Unscrew the chuck nut and pull out the delivery pipe carefully.
- Clean the pipe with deionized water.
Procedure to re-assemble delivery pipe:
- Place the delivery pipe in the lower housing until it stops completely from going further.
- Screw the chuck nut to complete the assembly.
Autoclaving
- Microlit LENTUS® Bottle Top Dispenser is fully autoclavable at 250°F or 121°C and 15 psi. It has a holding time of nearly 15 minutes.
Note: Only the piston needs to be removed for autoclaving the instrument. Piston is also autoclavable.
Disassembling for autoclaving:
- Pull the cap outwards to expose the calibration nut.
- Unscrew the calibration nut with the help of calibration tool to disassemble the piston and shaft from the main housing.
- After unscrewing, pull out the shaft.
- This is the piston shaft sub-assembly.
- Autoclave the two sub-assemblies at 121°C and 15 psi pressure for 15-20 minutes.
- The volume adjustment knob should always be kept in the ‘Unlocked’ position while autoclaving.

Cooling:
After autoclaving, cool the dispenser at room temperature for atleast 2 hours before use.
Re-assembling after autoclaving:
- Insert the piston completely into the cylinder and then reassemble the instrument. Use the calibration tool to screwing the piston.
- Snap the cap back to complete the assembly.
Dispenser is now ready for use. Recalibration is required after autoclaving.
What is a Bottle Top Dispenser?
Bottle Top Dispenser is crucial liquid handling equipment used by researchers and scientists in laboratories. It can measure solvents, chemicals, reagents, oil, and so on from several containers, which otherwise becomes a tedious and impractical task.
So, to multiply lab safety and prevent any hazardous activities, the Bottle Top Dispenser is vital for carrying out tasks easily and precisely without harming the laboratory environment.
Besides ensuring safety in the laboratory, the bottle top dispensers can be used to facilitate a broad range of applications and boost reliability. While working in labs, professionals take appropriate measures to conduct experiments, ensuring safety, especially while working with hazardous chemicals.
Components of Bottle Top Dispenser
Bottle top dispensers are a significant instrument used to avoid accidental spilling that reduces the risk of hazardous chemicals. These generally come with adapters that allow easy and comfortable placement. Here are the major components of a bottle top dispenser:
- Piston
The piston can be described as the heart of the bottle top dispenser, which produces the right amount of vacuum in the barrel for easy dispensing of liquids. A considerable amount of liquid gets collected through the upward piston movements in the dispenser cylinder. On the other hand, the downward movement promotes the easy release of liquid in the container through the dispensing valve.
- Glass barrel
 Another major component of a bottle top dispenser is the glass barrel responsible for holding the required amount of reagent in the instrument itself. If the piston is pulled upwards, the liquid gets collected into the glass barrel. If the piston is pulled downwards, the liquid exits from the barrel through a tube.
- Volume adjustment knob
Adjusting the volume is one of the most crucial parts of using any bottle-top dispenser. The volume adjustment knob is used for setting the target volume where the user wants to dispense. It includes a pointer with all the points printed on a volume scale. To set the volume, rotate the knob in the anticlockwise direction and vice-versa.
- Dispensing nozzle
Another major component of bottle-top dispensers is the dispensing nozzle. It is used for dispensing the liquid in the receiving bowl safely. In the case of our bottle-top dispensers, the dispensing nozzle is extremely flexible, making it easier to transfer the liquid directly.
- Nozzle cap
The nozzle cap is another significant component that prevents drops from spilling at the workplace. As a result, it prevents direct contact with the chemicals in laboratories.
- Inlet tube
The next on the list is the inlet tube used to draw the liquid from the reagent bottle. This tube is telescopic in length and nature. Also, it can be adjusted easily according to the number of reagent bottle sizes.
- Bottle adapter
The bottle top dispenser’s last but most important component is the bottle adapter, which is used for mounting bottle top dispensers such as LentusTM on the regent bottles of a number of sizes. These are provided with a complete set of five adapters. These include 28 mm, 32 mm, 38 mm, 40 mm and 45 mm. It ensures easy usage with all reagent bottles.
Various Types of Bottle Top Dispensers:
Here are the different types of Bottle Top Dispensers:
- Beatus Bottle Top Dispenser
Incorporated with Springless Valve® and Recirculation Valve Technology, the Microlit Beatus is an ideal choice that prevents the loss of chemicals or reagents while performing experiments. It helps in achieving accuracy with reliability in labs.
- Scitus Bottle Top Dispenser
 Incorporated with Springless Valve® Technology, the Microlit Scitus is an advanced liquid handling tool that is an ultimate blend of sophisticated features and functionalities. The product is specially designed by in-house designers who believe in bringing out the best. This bottle-top dispenser from Microlit promotes jam-free functioning.
- LentusTM Bottle Top Dispenser
A high-precision liquid handling tool, the Microlit Lentus® is engineered with perfection to be used with hydrofluoric acid, a highly corrosive acid. While conducting experiments, the Lentus® Bottle Top Dispenser exhibits top-notch chemical compatibility and brings accurate results.
- Ultimus Bottle Top Dispenser
Incorporated with Dual Inlet® Technology, the Microlit Ultimus dispenser offers four unique modes of operation – bottle refilling, rinsing, dilution, and purging. This product is ideal for achieving precision with reliability while working in laboratories.
How to use Bottle Top Dispenser?
Understanding the calibration report is the first step in using the bottle-top dispensers. Go through the reports thoroughly to estimate the instrument’s behaviour.
Ensure you’re picking an appropriate adapter that helps to mount the dispenser. These adapters are made using polypropylene. Note that ETFE/PTFE is specifically designed for aggressive acids only.
The sizes available are 28 mm, 32 mm, 36 mm, 40 mm, and 45 mm. The telescoping tube is attached properly to different bottle sizes. Once the inlet tube is connected, mount the tube onto the reagent bottle and bolt the dispenser together.
Once the dispenser is tightly screwed with the bottle, it is important to knock out all the air. For this, switch on the recirculation knob, and keep it the same for a few minutes until bubbles are seen.
One major step before starting the dispenser is to set up the volume correctly. Set the volume using the volume adjustment knob.
Start dispensing.
How to Choose the Right Bottle Top Dispenser?
The Bottle Top Dispenser is a widely used scientific tool to dispense chemical reagent precisely. Generally choosing a Bottle Top Dispenser depends on the amount of liquid and its types. However, there are other factors to consider when choosing a right Bottle Top Dispenser for the laboratory.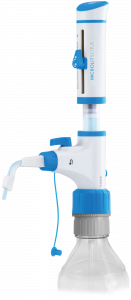
Chemical compatibility – When selecting a Bottle Top Dispenser, the user should check the chemical compatibility of the dispenser with the reagent to be dispensed. Some manufacturers offer different Bottle Top Dispenser models for different types of reagents – organics, inorganics, solvents etc. However, the Microlit dispenser, with its unique Springless Valve™ system is a universal dispenser for all types of reagents. All manufacturers offer a chemical compatibility chart with their dispensers. This includes all the commonly used reagents and their compatibility with the materials used in the construction of the dispenser. Please be sure to check this compatibility chart before making a purchase.
The commonly used reagents with Bottle Top Dispensers can be categorized as follows:
Acids: Examples include Acetic Acid, Hydrochloric Acid, Sulfuric Acid, and Nitric acid
Bases: Examples include Acetyl chloride, Ammonia, Pyridine and sodium hydroxide
Organic Reagents: Examples include Toluene, Methanol, Trichloro trifluoroethane and Dichloromethane.
Highly Corrosive Acids: Hydrofluoric Acid
Viscosity of the reagent – If you need do dispense viscous liquids such as Essential Oils, Botanical Extracts, Grain Alcohol and Vegetable Glycerine, the applicable viscosity range for the dispenser needs to be considered.:
Highly viscous liquids with a kinematic viscosity of between 75 to 500 mm2/second will require careful selection while reagents having kinematic viscosity below 75 mm2/second can be used with any kind of bottle top dispenser efficiently.
Capacity of the dispenser – Bottle Top Dispenser comes in both fixed volume and adjustable volume models with a specific range of liquid quantity. The volume can be adjusted either manually with the help of a knob or dialled electronically through a control panel. So, it is necessary to make sure that your selected Bottle Top Dispensers are able to dispense the amount of liquid that is frequently required for your experiments. Note that dispensers with lower capacities offer higher accuracy and precision. So, if you want to dispense 10ml, a 1-10ml dispenser is recommended over a 2.5-30 ml dispenser to ensure more accurate results.
At Microlit, the Bottle Top Dispensers are available in the following ranges –
How is a Bottle Top Dispenser calibrated?
Every bottle top dispenser is calibrated individually in an ISO 17025 certified laboratory. Also, it comes with a calibration certificate. In case there is a drastic change in the environmental conditions, re-calibrated is suggested. In order to re-calibrate the instrument, follow the below-mentioned steps:
- Set the instrument at 50% of the total capacity.
- Stick to the standard calibration rules which are used in statistical quality control.
- Set the volume rightly and start dispensing the distilled water at 20°C.
- In case there is a difference between the calculated average mean and the preset volume, re-calibration is needed.
- In order to perform re-calibration, pull the cap in the outwards direction. To reduce the volume, turn the nut in a clockwise direction. For reducing the volume and anticlockwise for increasing the volume. Keep on repeating the procedure until you reach the desired results.
Benefits of using a Bottle Top Dispenser
Besides ensuring safety in the laboratory, Bottle Top Dispensers can be used to facilitate a broad range of applications and boost reliability. While working in labs, professionals take appropriate measures to conduct experiments, ensuring safety, especially while working with hazardous chemicals.
The Bottle Top Dispensers are designed to include the following benefits:
- Easy and safe to use while conducting experiments
- Ensures high accuracy with only 0.5% – 0.6% variation
- Enhances overall working productivity
- Facilitates routine work
- Minimizes the wastage of chemicals or reagents
- Fits in budget
Why are Microlit Bottle Top Dispensers the best choice for your lab?
 Here is why you need Bottle Top Dispensers in your labs
- Aggressive Chemicals
While working with harsh chemicals, the lab professionals are indeed extra cautious. However, there are still considerable chances of it dripping on the tabletop, which might come in contact with the skin, leading to several harmful effects, including severe burns. So, to prevent such situations, the best way is to use a bottle top dispenser which ensures there is no dripping of chemicals onto the table or hands.
- Reagent Tubes
While conducting experiments, the bottle-top dispensers make the process way easier and safe, especially for the lab professional. It becomes easy to fill up tubes using dispensers as it offers an array of advantages, including high speed, improved precision, and reproducibility.
- Fuming Acids
There are cases when moisture enters bottles containing fuming acids. In order to prevent it from coming in contact with the outside world, Bottle Top Dispensers are a perfect way to go. It keeps the solution moisture-free which minimizes any chances of risks.
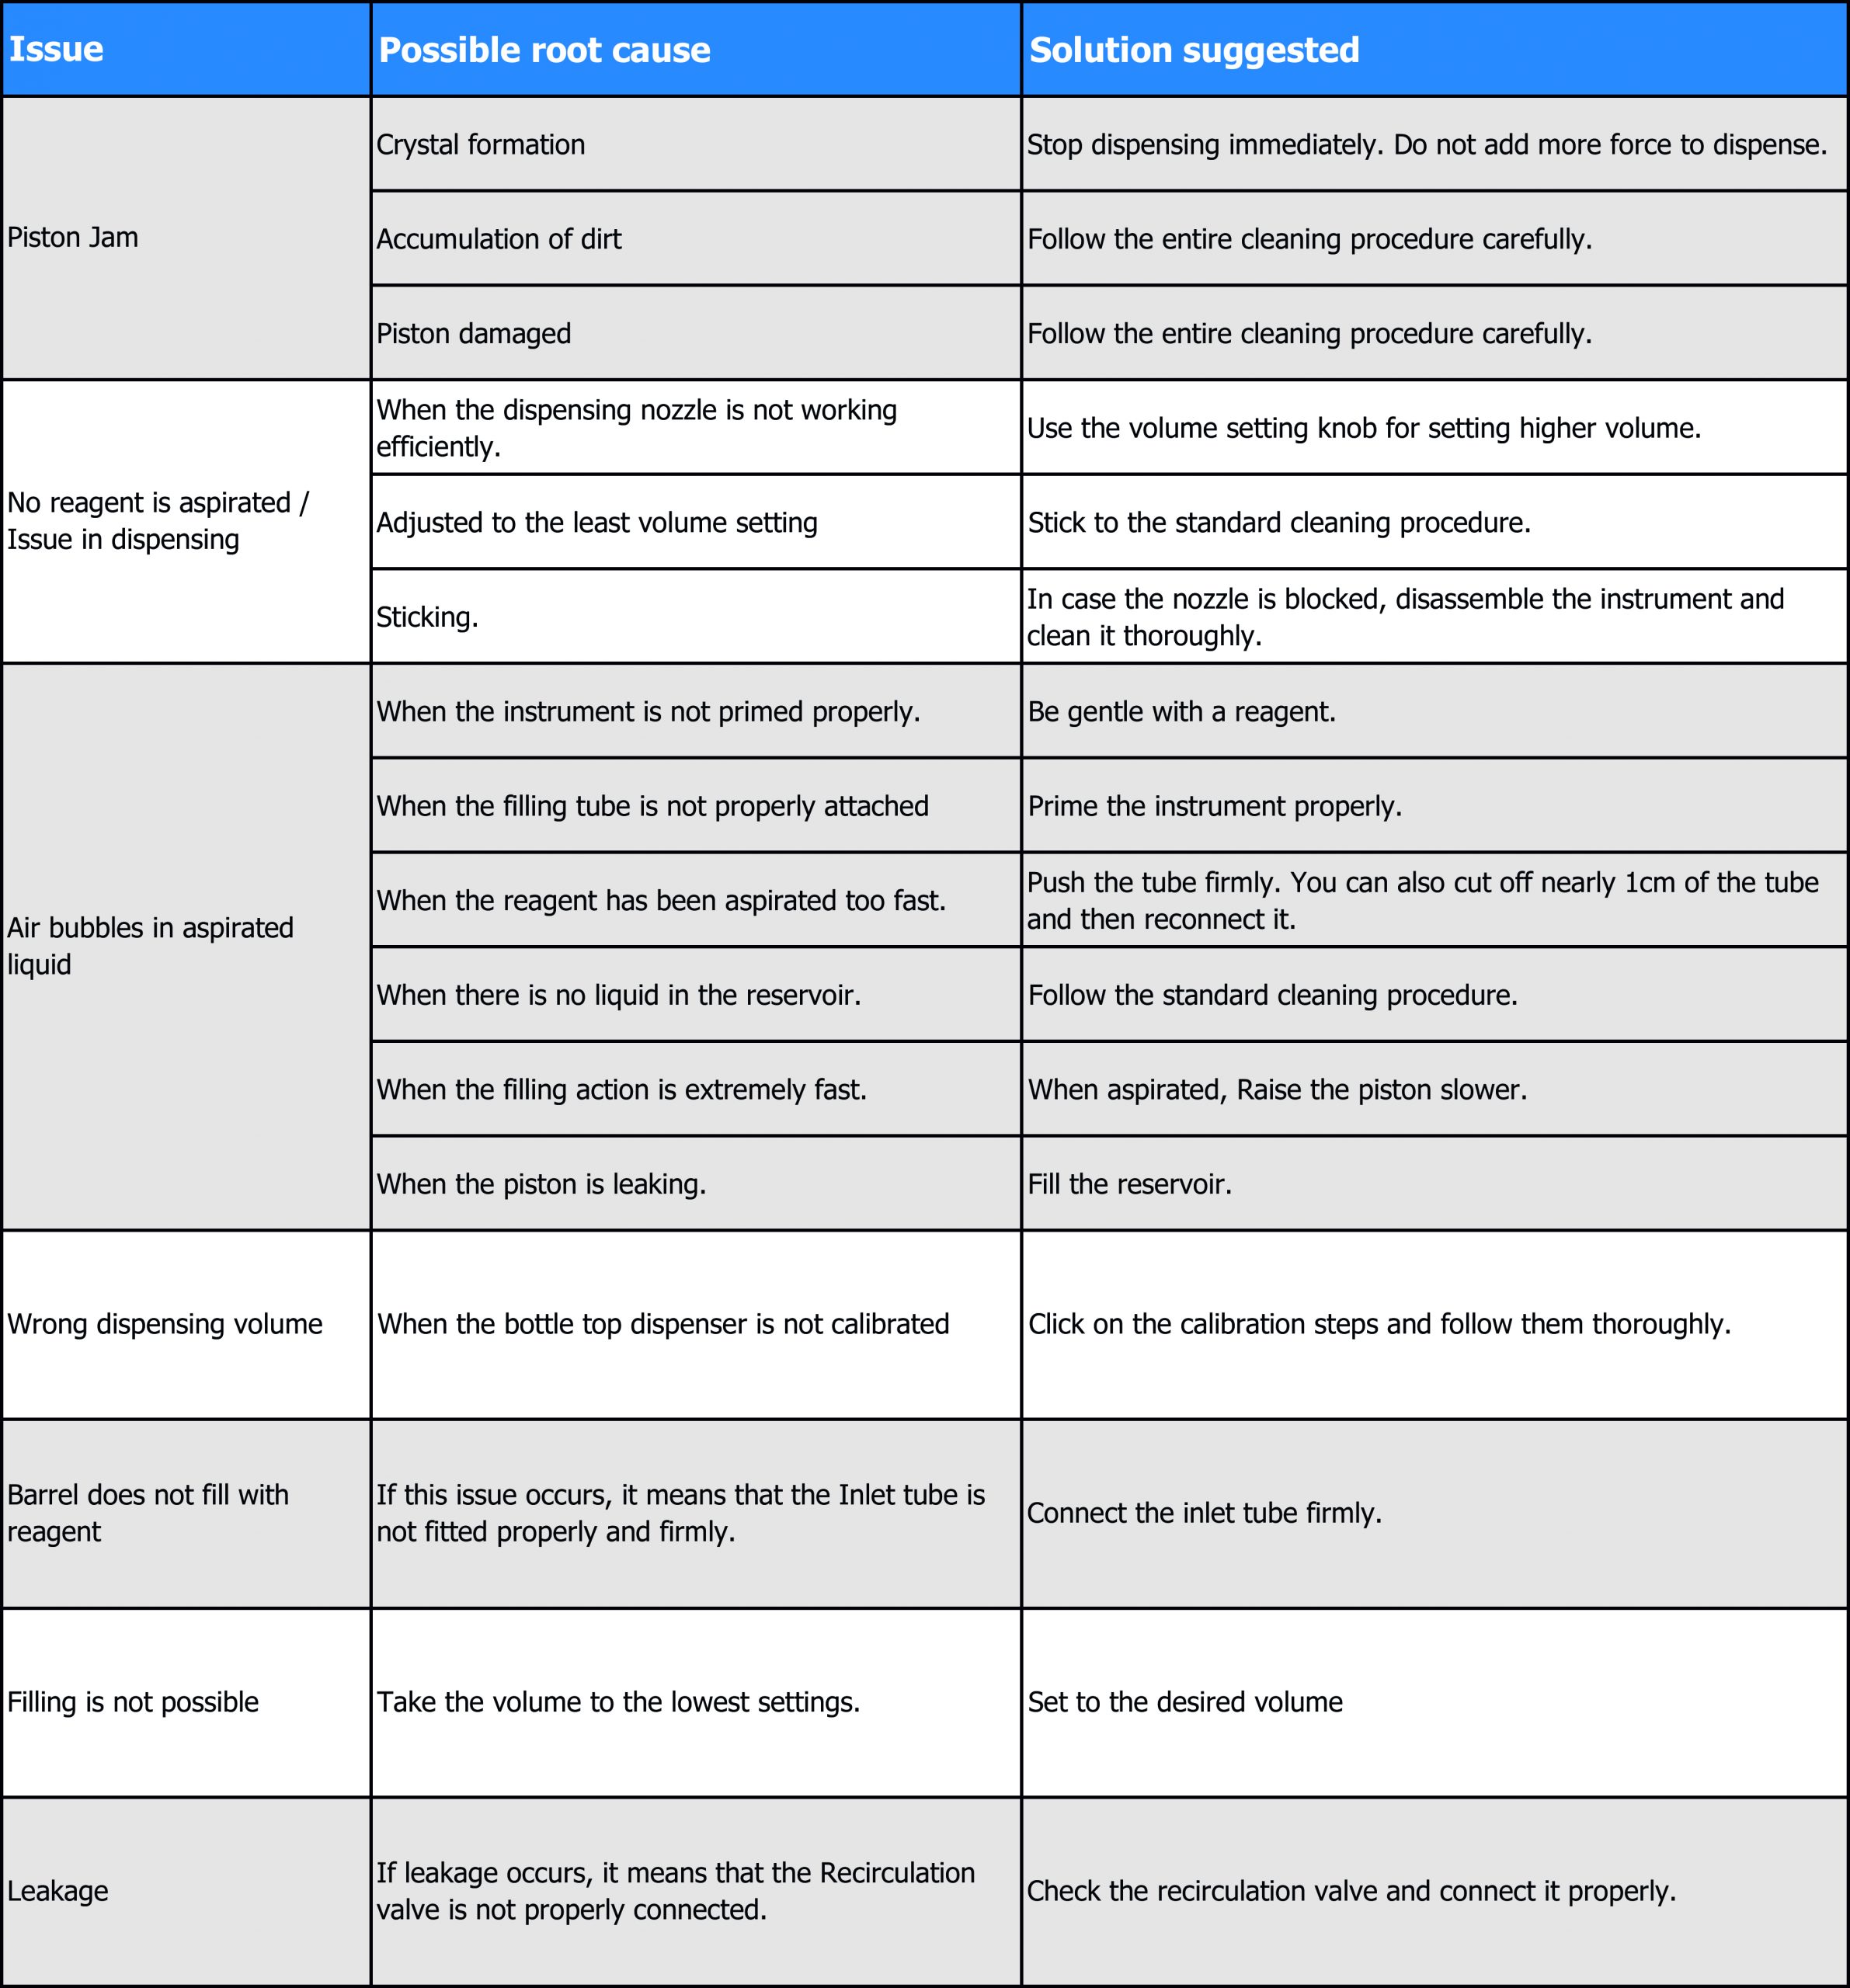
Troubleshooting:
Frequently Asked Questions (FAQs)
- How can I prevent any leakage from the Bottle Top Dispenser?
If there is any leakage in the Bottle Top Dispenser, it means that the Recirculation valve is not properly connected. Make sure you Check the recirculation valve and connect it properly.
- What if there are Air bubbles in the aspirated liquid?
This mainly occurs in four major conditions. These include:
- When the instrument is not primed properly;
- When the filling tube is not properly attached;
- When the reagent has been aspirated too fast;
- When there is no liquid in the reservoir.
- To avoid such conditions,
- Be gentle with the reagent.
- Prime the instrument properly.
- Push the tube firmly. You can also cut off nearly 1cm of the tube and reconnect it.
- Follow the standard cleaning procedure.
- What are the benefits of Bottle Top Dispensers?
The bottle top dispenser holds a lot of significance. These are as follows:
- Easy and safe to use while conducting experiments;
- Ensures high accuracy with only 0.5% – 0.6% variation;
- Enhances overall working productivity;
- Facilitates routine work;
- Minimizes the wastage of chemicals or reagents;
- Fits in the budget.
- What do you understand by Piston, a component of a Bottle Top Dispenser?
The Piston can be described as the heart of the Bottle Top Dispenser, which produces the right amount of vacuum in the barrel for easy dispensing of liquids. Through the upward piston movements, a considerable amount of liquid gets collected in the dispenser cylinder. On the other hand, the downward movement promotes the easy release of liquid in the container through the dispensing valve.
- How to clean Bottle Top Dispensers?
Before going for cleaning, make sure you wear protective gear. These include glasses, gloves and protective clothing. Before starting the cleaning process, make sure there is no liquid left in the barrel. Place the bottle and instrument together in the empty sink.
Separate the instrument from the bottle. Tap the inlet tube inside the reservoir carefully till there is no reagent left in the inlet tube. You may also use clean water to dispense it. In case it is still not cleaned, disassemble the instrument and start the cleaning process.
- What comes in the packaging box when you order a LENTUS® from Microlit?
The following are the parts that come with the bottle-top dispenser from Microlit
- Bottle Top Dispenser,
- Telescopic tube,
- Calibration tool,
- Bottle adapters (28mm, 32mm, 38mm, 40mm, 45mm),
- 1 Calibration Certificate.
For any info/query/demo, email us at info@microlit.com